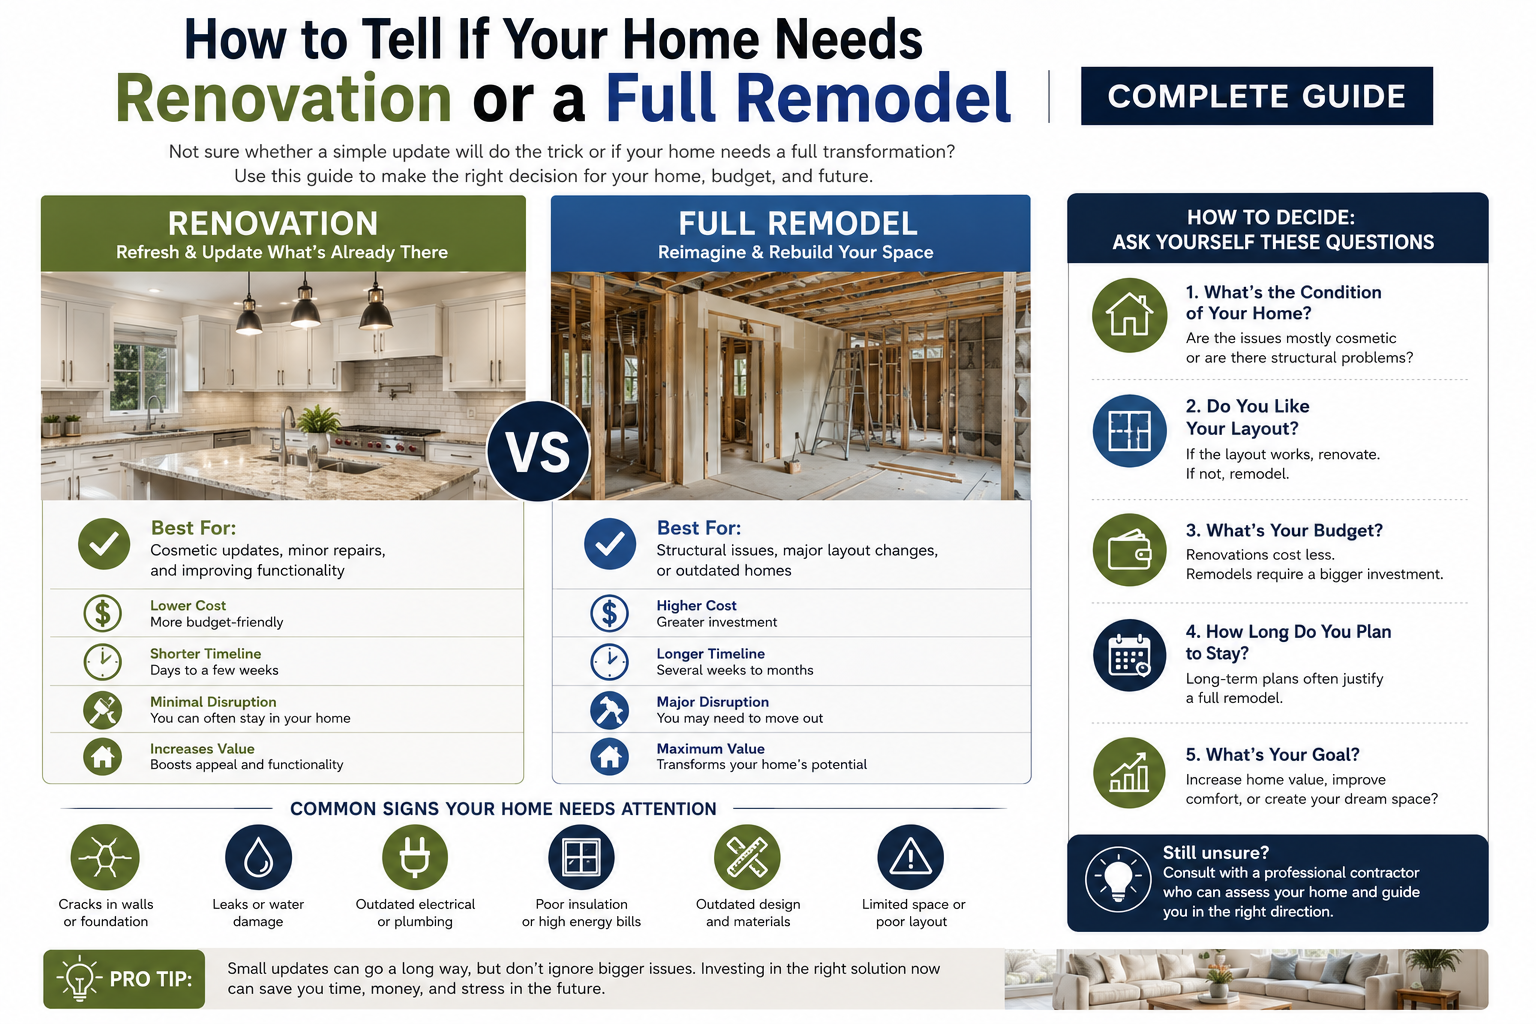
You can tell if your home needs renovation or a full remodel by evaluating the problems you want to solve. Renovation is best for updating outdated finishes, fixtures, and appearances, while remodeling is needed for layout changes, structural issues, outdated systems, or major improvements that change how your home functions.
Renovation vs Remodel: Understanding What Your Home Actually Needs
Many homeowners reach a point where their house no longer feels updated, comfortable, or suitable for their lifestyle. However, deciding whether you need a renovation or a full remodel can be confusing. While both options improve your home, the level of work and the problems they solve are very different.
A renovation focuses on improving what already exists. It is ideal when your home’s layout works well, major systems are in good condition, and you mainly want to update the appearance. Projects like replacing flooring, upgrading finishes, repainting walls, or improving fixtures can completely refresh a home without major construction changes.
| Renovation | Full Remodel |
|---|---|
| Updates existing spaces | Changes structure or function |
| Focuses on appearance and improvements | Focuses on redesign and transformation |
| Usually fewer construction changes | Often involves major construction work |
| Best for homes with good layouts | Best for homes with outdated designs or problems |
Signs Your Home Only Needs Renovation
A renovation is often the right choice when your home still works well but feels outdated. Many homes do not need walls moved or major construction; they simply need modern finishes, better functionality, and updated features.
If your home’s layout fits your lifestyle, rooms are properly sized, and major systems are working correctly, a renovation can provide a significant improvement without the expense and disruption of a full remodel. This approach allows homeowners to focus their budget on the areas that create the biggest visual and functional impact.
Your Home Looks Outdated but Functions Well
One of the clearest signs that your home needs renovation rather than remodeling is when the space works properly but no longer matches your style or modern expectations. For example, a kitchen may have enough space and storage but still feel old because of outdated cabinets, countertops, lighting, or finishes.
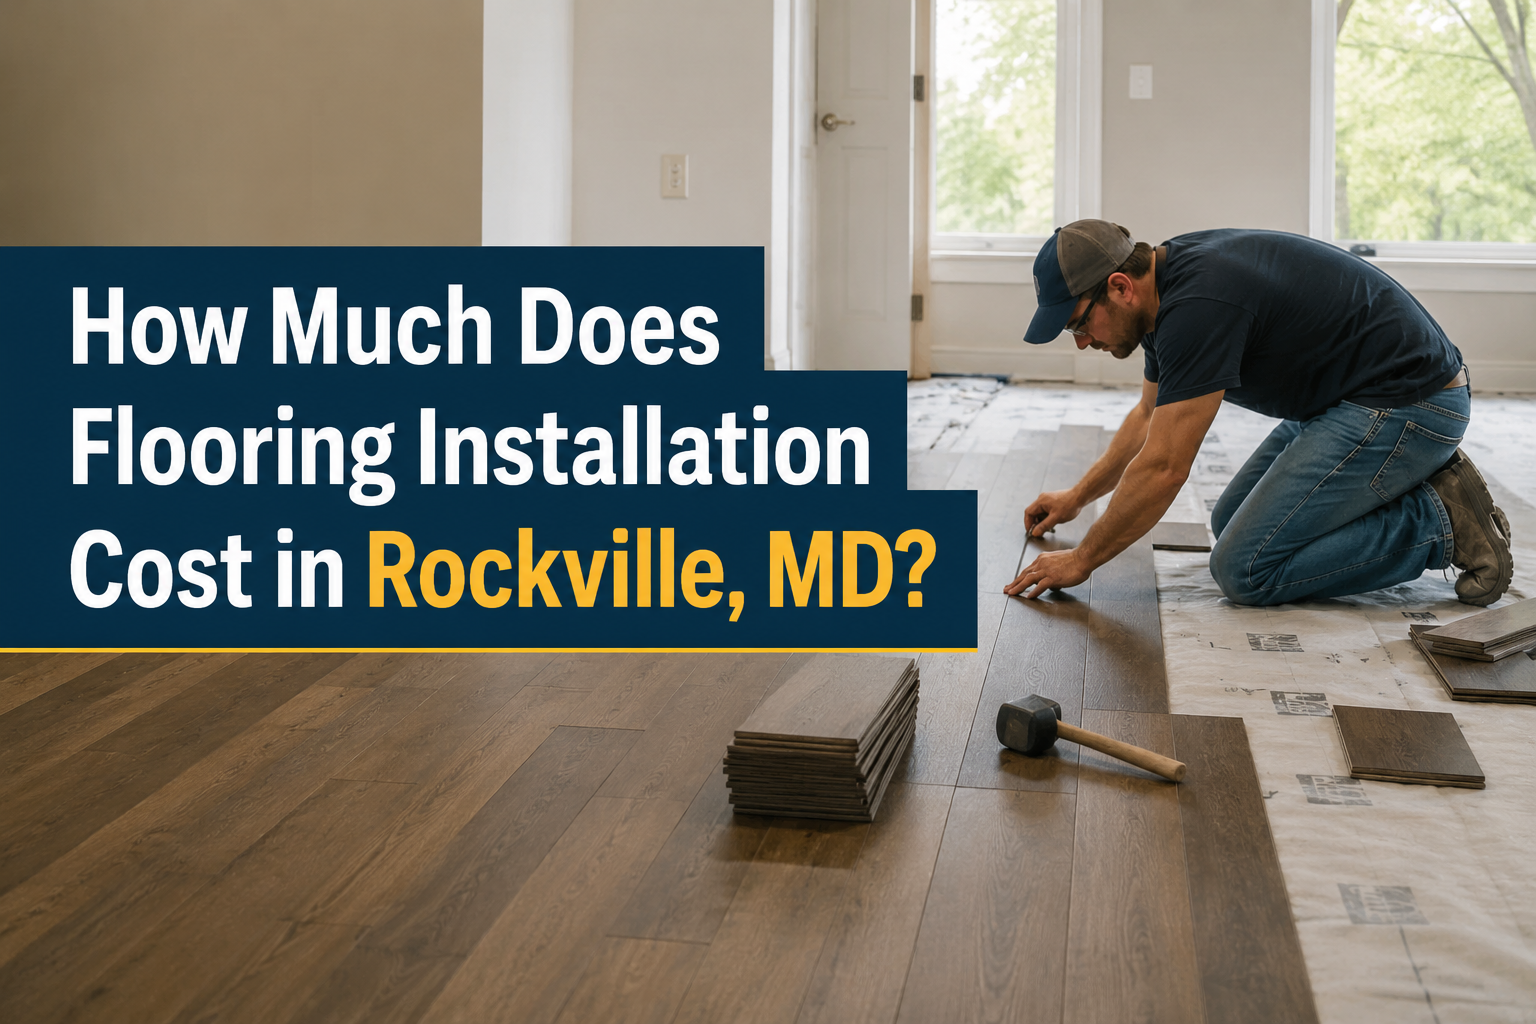
In these situations, targeted improvements can create a completely refreshed look. Replacing worn flooring, updating fixtures, improving lighting, and modernizing surfaces can make the home feel new while keeping the original layout intact.
Your Major Home Systems Are Still in Good Condition
Before deciding on a full remodel, homeowners should consider the condition of important systems such as plumbing, electrical, HVAC, and structural components. If these areas are reliable and do not require major repairs, renovation is often a more practical option.
Updating finishes and improving specific areas can deliver the results homeowners want without unnecessary construction. However, if problems such as leaks, structural damage, or outdated systems are discovered, the project may require Reconstruction and Remodeling to address deeper issues before cosmetic improvements begin.
Questions to Ask Before Choosing Renovation or Remodeling
Before deciding between renovation and a full remodel, homeowners should first understand what problems they want to solve. A renovation may be enough if the home only feels outdated, but a remodel may be necessary when the layout, functionality, or major systems no longer meet your needs. Evaluating your goals, budget, and the condition of your home can help you choose the right approach.
Consider these questions before starting your project:
- Does my current home layout work for my lifestyle?
- Am I updating appearance or solving functional problems?
- Are there hidden issues that need repairs?
- Will this improvement add long-term value to my home?
Home Areas That Often Require Remodeling
Some areas of a home are more likely to need remodeling because they affect daily comfort and functionality. Kitchens, bathrooms, and entire living spaces often become outdated over time due to changing lifestyles, older materials, or inefficient designs. Updating these areas can improve both the appearance and usability of your home.
Common remodeling areas include:
- Kitchens with outdated layouts or limited storage
- Bathrooms with old fixtures or poor functionality
- Living spaces that need better flow or additional space
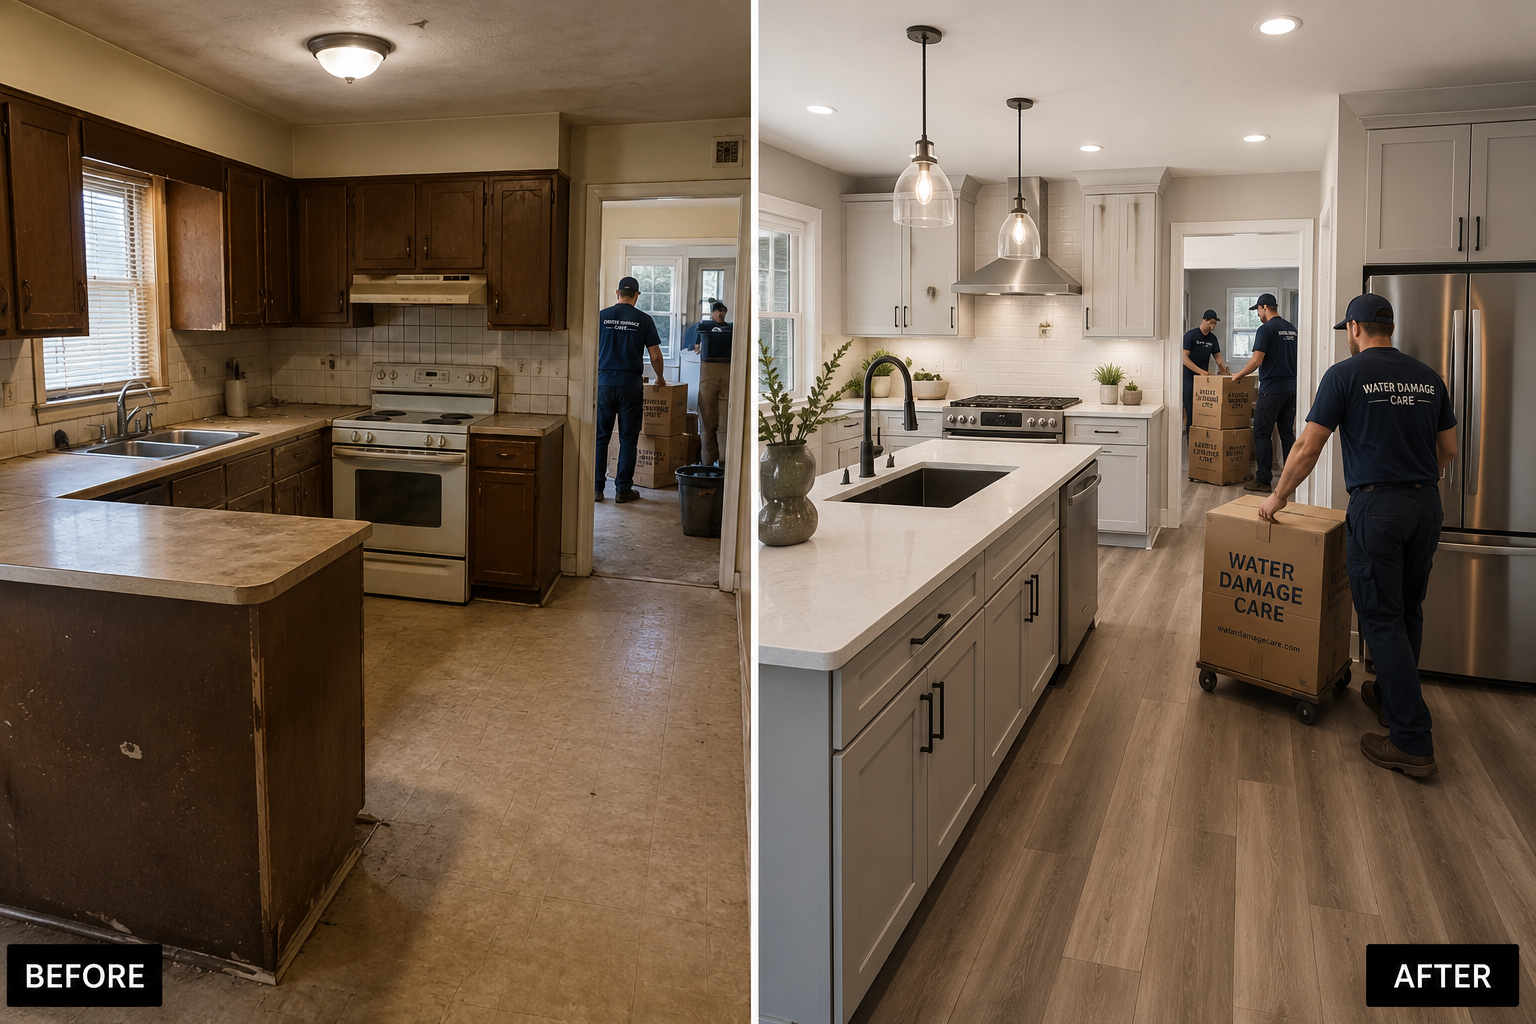
Kitchen Remodeling
The kitchen is one of the most common areas homeowners choose to remodel because it is often the center of daily activity. If your kitchen feels cramped, outdated, or difficult to use, a remodel can improve storage, workflow, and overall design. Changes may include updated cabinets, countertops, flooring, lighting, and layout improvements.
A kitchen remodel may include:
- Cabinet and countertop upgrades
- Improved lighting and storage solutions
- Updated flooring and modern finishes
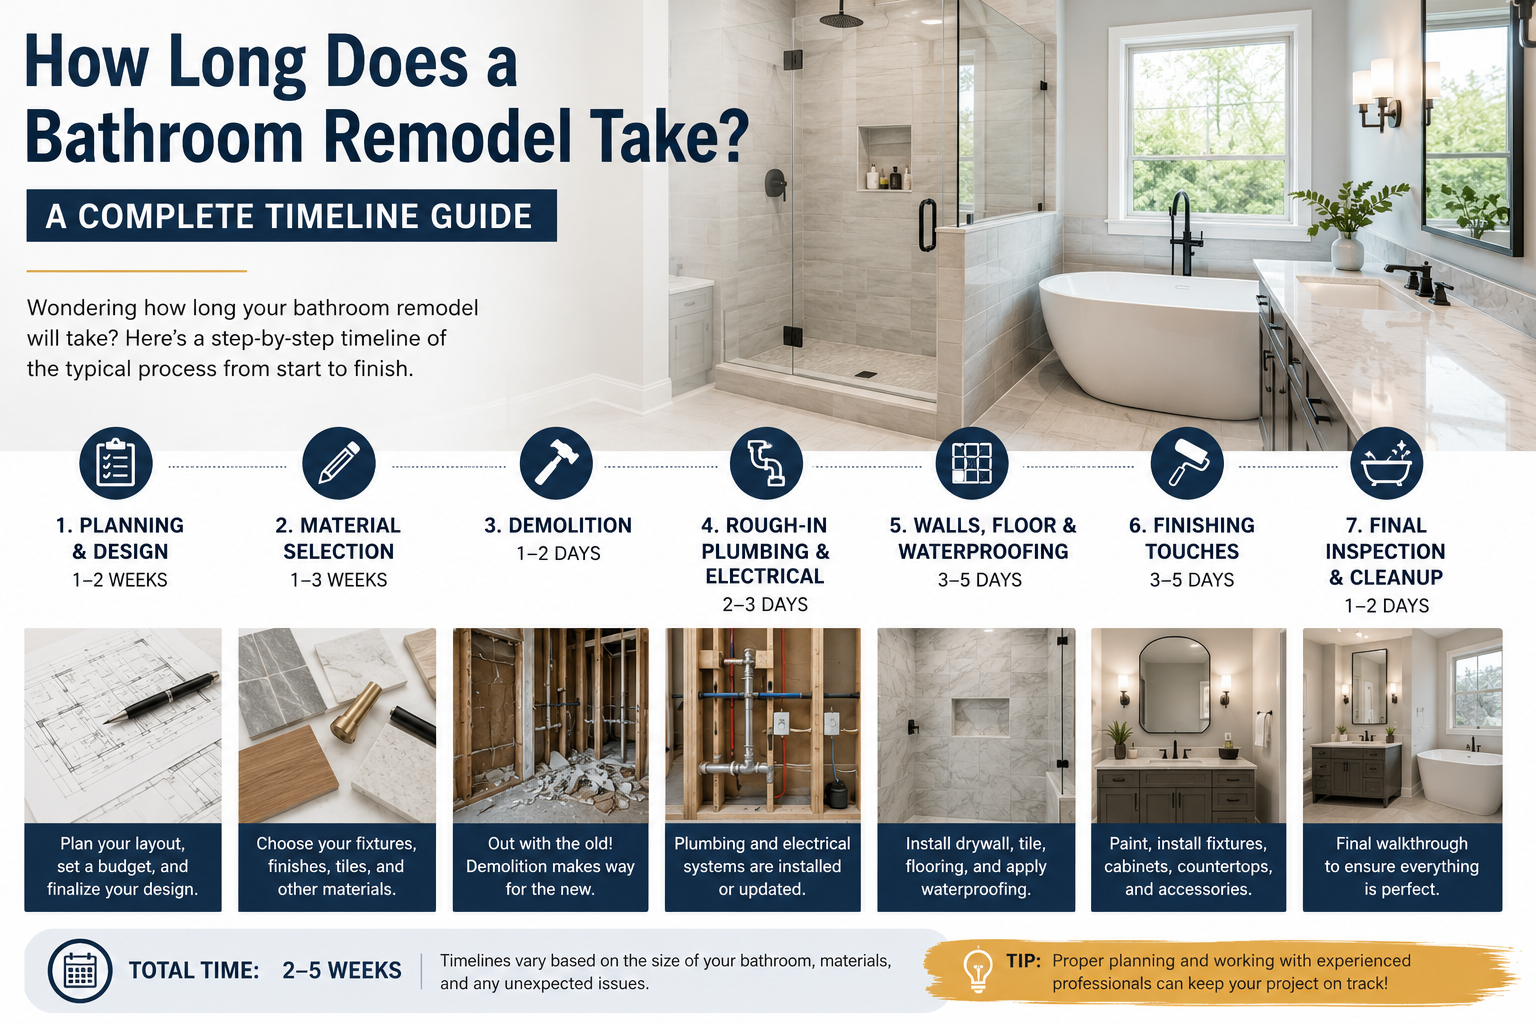
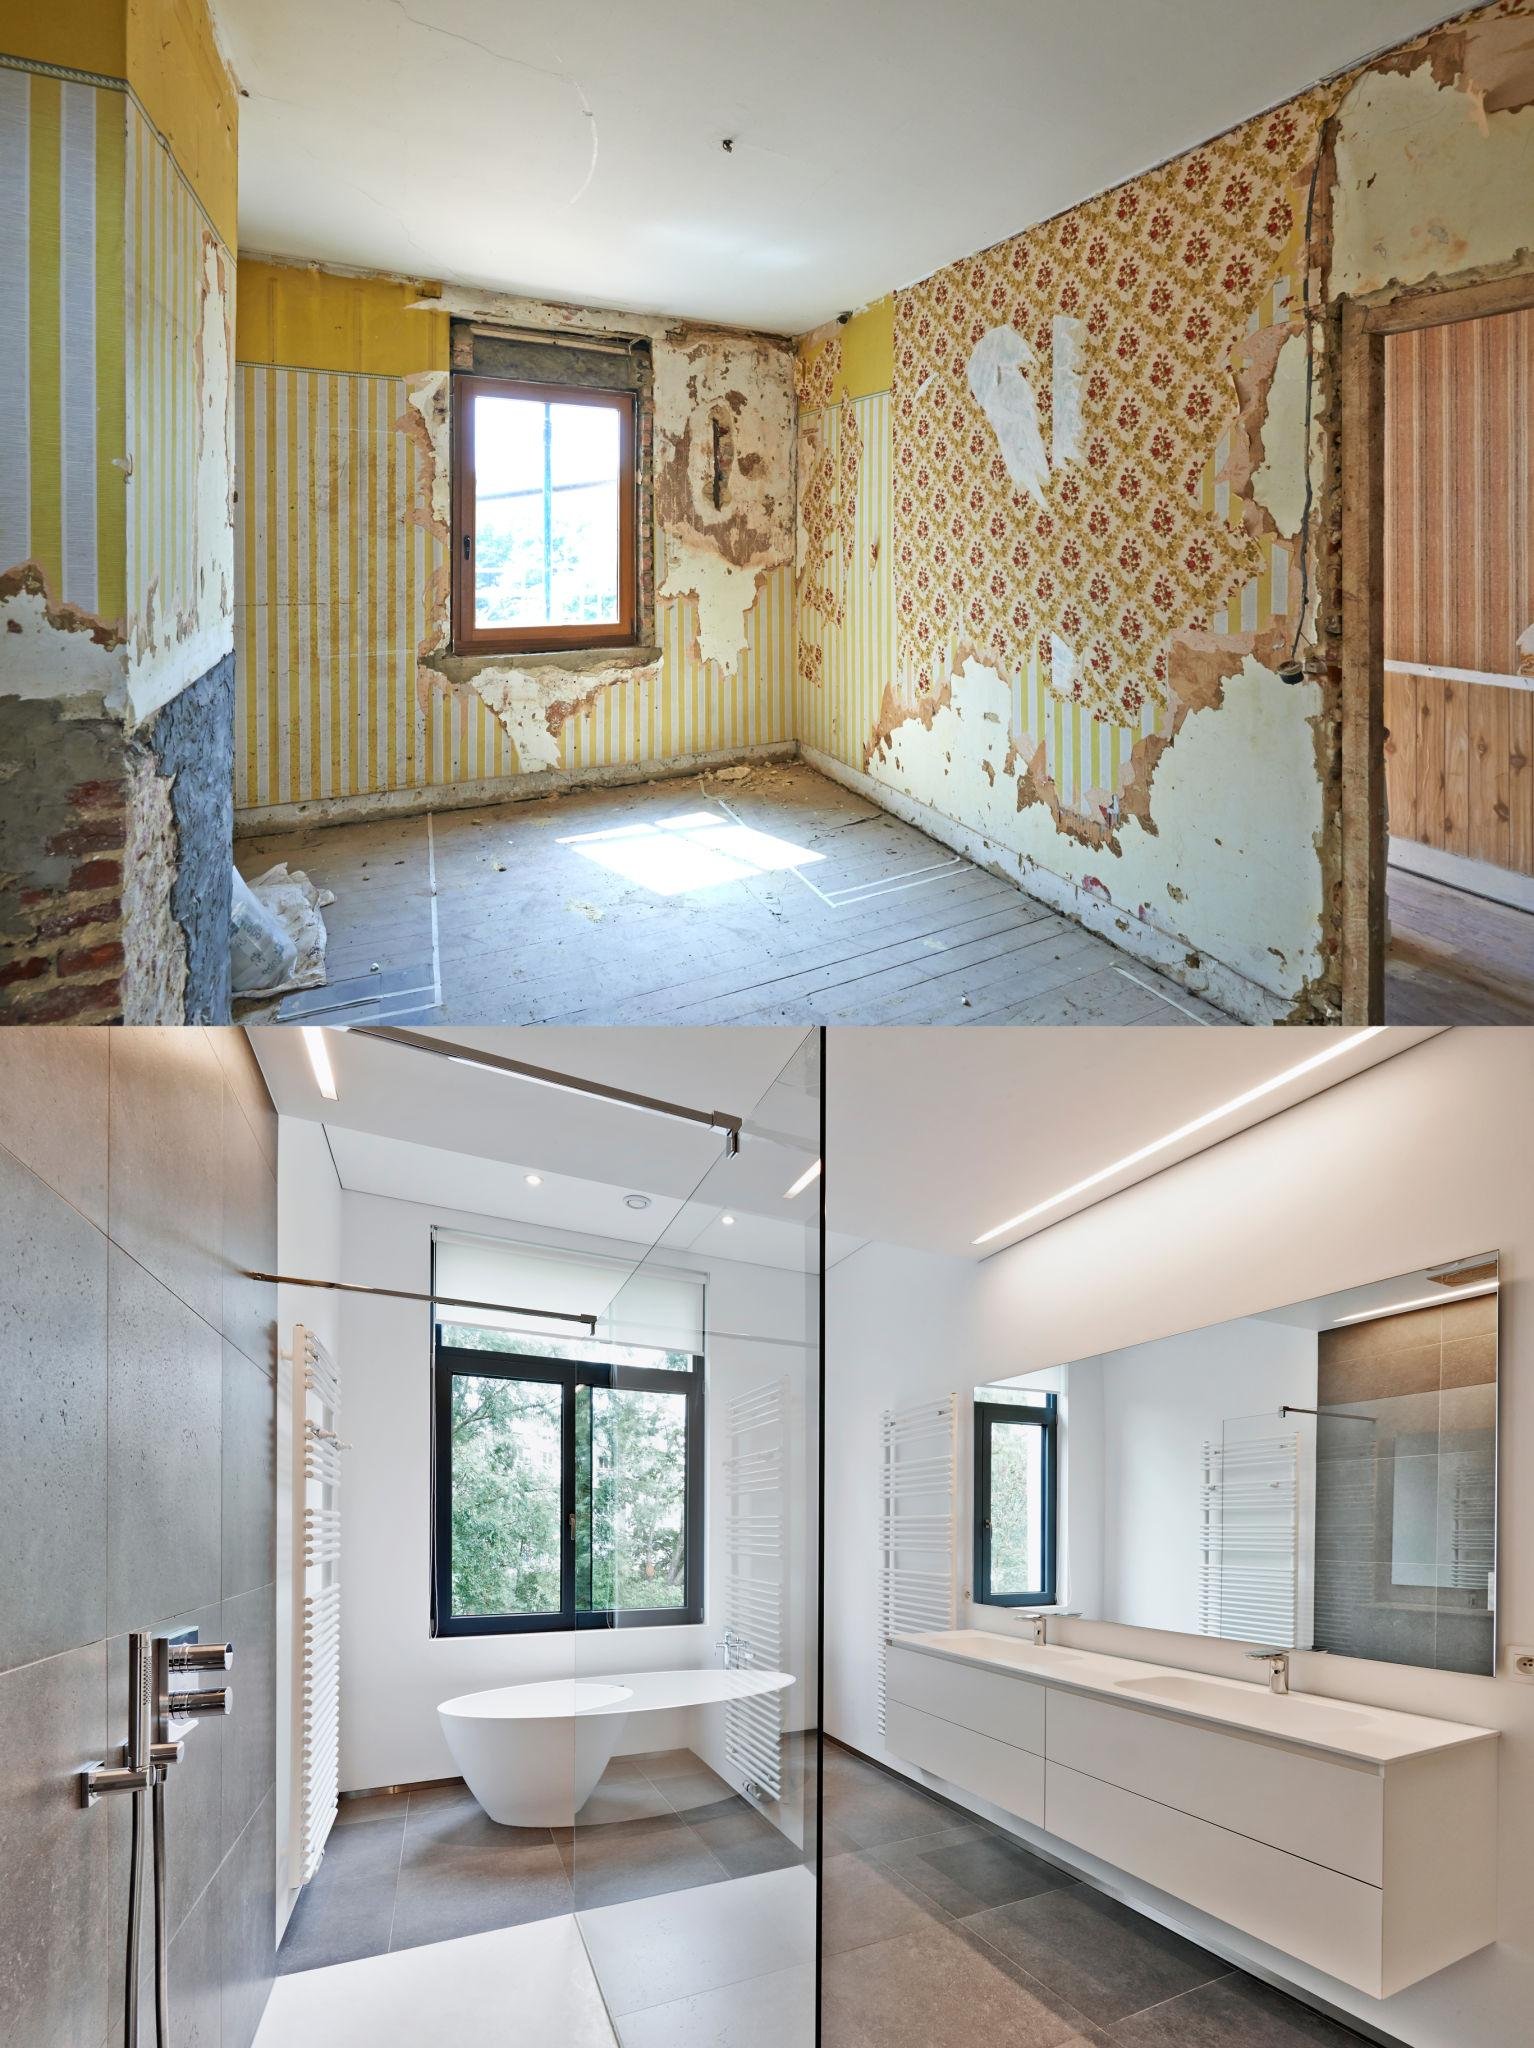
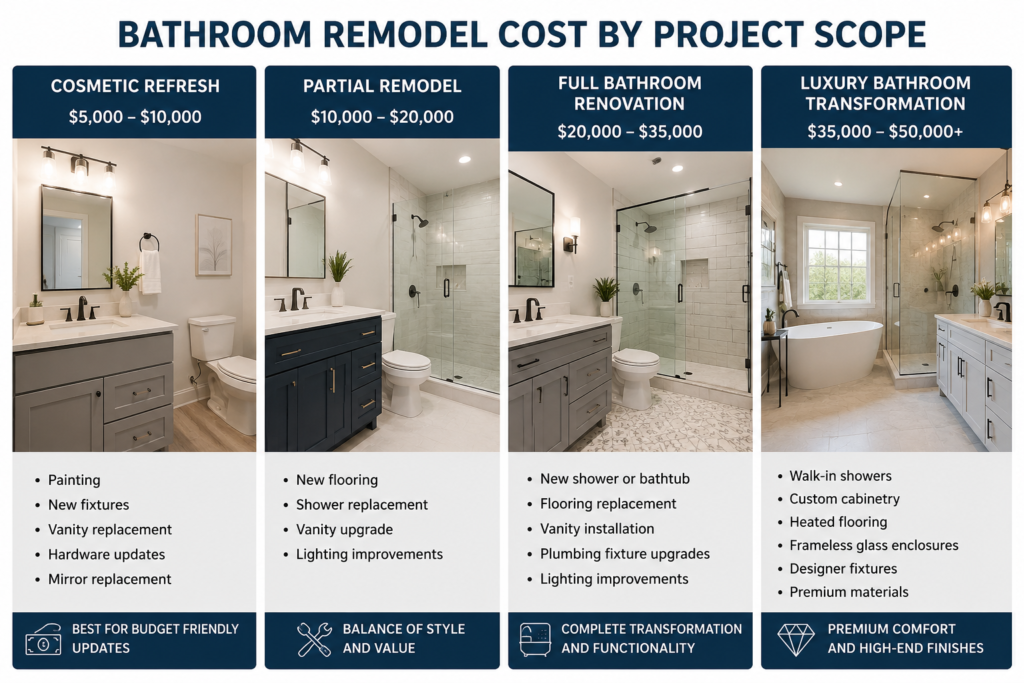
Bathroom Remodeling
Bathrooms often require remodeling when outdated designs, damaged materials, or poor layouts affect comfort and functionality. A bathroom remodel can improve the space by upgrading fixtures, improving storage, replacing old surfaces, and creating a more modern design. If hidden moisture problems or damage are discovered, additional repairs may be needed before completing the upgrades.
Bathroom improvements may include:
- New showers, tubs, and fixtures
- Updated flooring and tile
- Better storage and improved layouts
Whole-Home Remodeling
A whole-home remodel is usually considered when multiple areas of the house need major improvements. Instead of updating one room, this approach allows homeowners to create a consistent design, improve functionality, and address outdated systems throughout the property.
A whole-home remodel may involve:
- Multiple room upgrades
- Layout changes
- Electrical, plumbing, or structural improvements
- Complete interior transformation
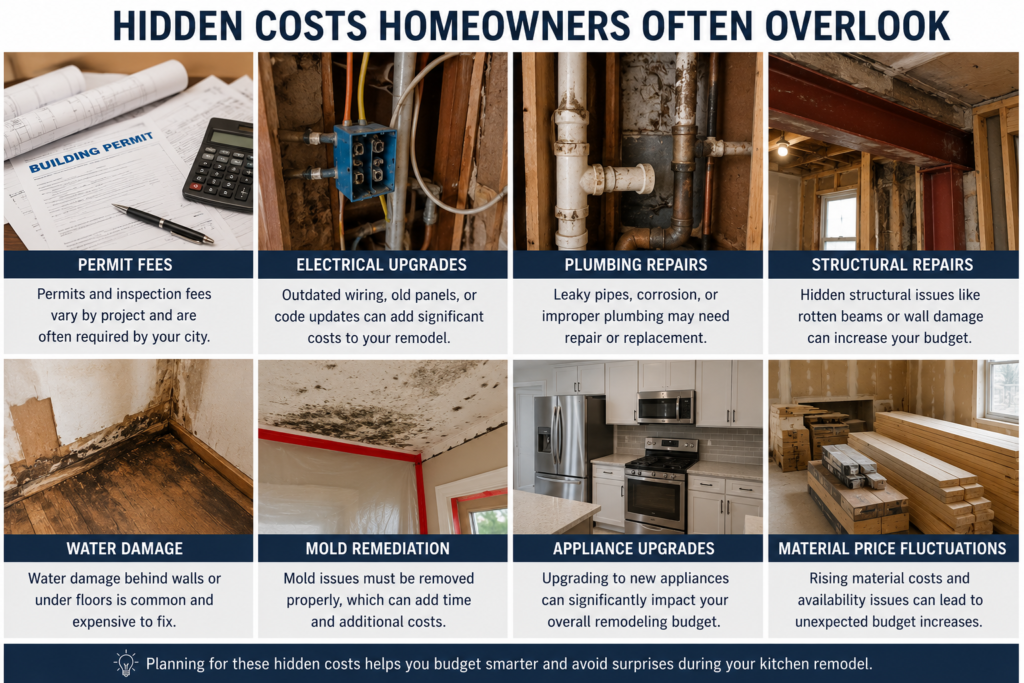
Hidden Issues That Can Change a Renovation Into a Remodel
Sometimes a project that starts as a simple renovation becomes a larger remodel after hidden problems are discovered. Issues behind walls, under flooring, or inside ceilings can increase the project scope and require additional repairs before cosmetic improvements can continue.
Common hidden problems include:
- Water damage or mold
- Damaged framing or subfloors
- Outdated electrical or plumbing systems
When major damage affects the structure of your home, Reconstruction and Remodeling may be needed to restore the affected areas before finishing the renovation.
How to Decide Which Option Is Right for Your Home
The right choice depends on your home’s condition, your goals, and the type of improvements you want to make. If your home functions well but looks outdated, renovation may provide the results you need. If you are dealing with layout problems, major repairs, or outdated systems, a full remodel may offer better long-term value.
| Situation | Recommended Option |
|---|---|
| Outdated finishes and fixtures | Renovation |
| Poor layout or limited functionality | Remodel |
| Major system problems | Remodel |
| Cosmetic improvements only | Renovation |
Benefits of Working With a Professional Remodeling Contractor
A professional contractor can help you understand whether your home needs renovation or remodeling by evaluating the current condition and identifying potential challenges. Experienced professionals can also manage planning, materials, construction steps, and unexpected issues to help keep the project organized.
Working with a professional helps with:
- Accurate project planning
- Quality installation
- Proper handling of unexpected problems
- Better long-term results
conclusion
Understanding whether your home needs renovation or a full remodel helps you make smarter decisions with your time and budget. Simple updates may be enough for homes with good layouts and working systems, while larger remodeling projects are better for homes that need functional improvements or major repairs. A proper evaluation before starting can help you create a home that better fits your needs.
FAQs
What is the difference between renovation and remodeling?
Renovation updates existing features, while remodeling changes the structure, layout, or function of a home.
How do I know if my home needs a full remodel?
Your home may need remodeling if it has poor layouts, outdated systems, structural issues, or major functionality problems.
Is renovating a house cheaper than remodeling?
Yes, renovations are usually less expensive because they focus on improvements without major structural changes.
What are signs my home needs renovation?
Outdated finishes, old fixtures, worn flooring, and cosmetic issues are common signs your home needs renovation.
Does remodeling increase home value?
A well-planned remodel can improve comfort, functionality, and the resale value of your home.
Should I renovate or remodel my kitchen?
If the layout works but looks outdated, renovate. If the space is inefficient, a remodel may be better.
Can hidden damage turn a renovation into a remodel?
Yes, issues like water damage, mold, or structural problems can increase the project scope.
Reference
- Residential building codes and remodeling standards:
International Code Council (ICC) - Home improvement and remodeling resources:
National Association of Home Builders (NAHB) - Energy-efficient home upgrades and renovation planning:
U.S. Department of Energy – Energy Saver