Category: Reconstruction & Remodeling

  • How to Tell If Your Home Needs Renovation or a Full Remodel | Complete Guide

    How to Tell If Your Home Needs Renovation or a Full Remodel | Complete Guide

    You can tell if your home needs renovation or a full remodel by evaluating the problems you want to solve. Renovation is best for updating outdated finishes, fixtures, and appearances, while remodeling is needed for layout changes, structural issues, outdated systems, or major improvements that change how your home functions.

    Renovation vs Remodel: Understanding What Your Home Actually Needs

    Many homeowners reach a point where their house no longer feels updated, comfortable, or suitable for their lifestyle. However, deciding whether you need a renovation or a full remodel can be confusing. While both options improve your home, the level of work and the problems they solve are very different.

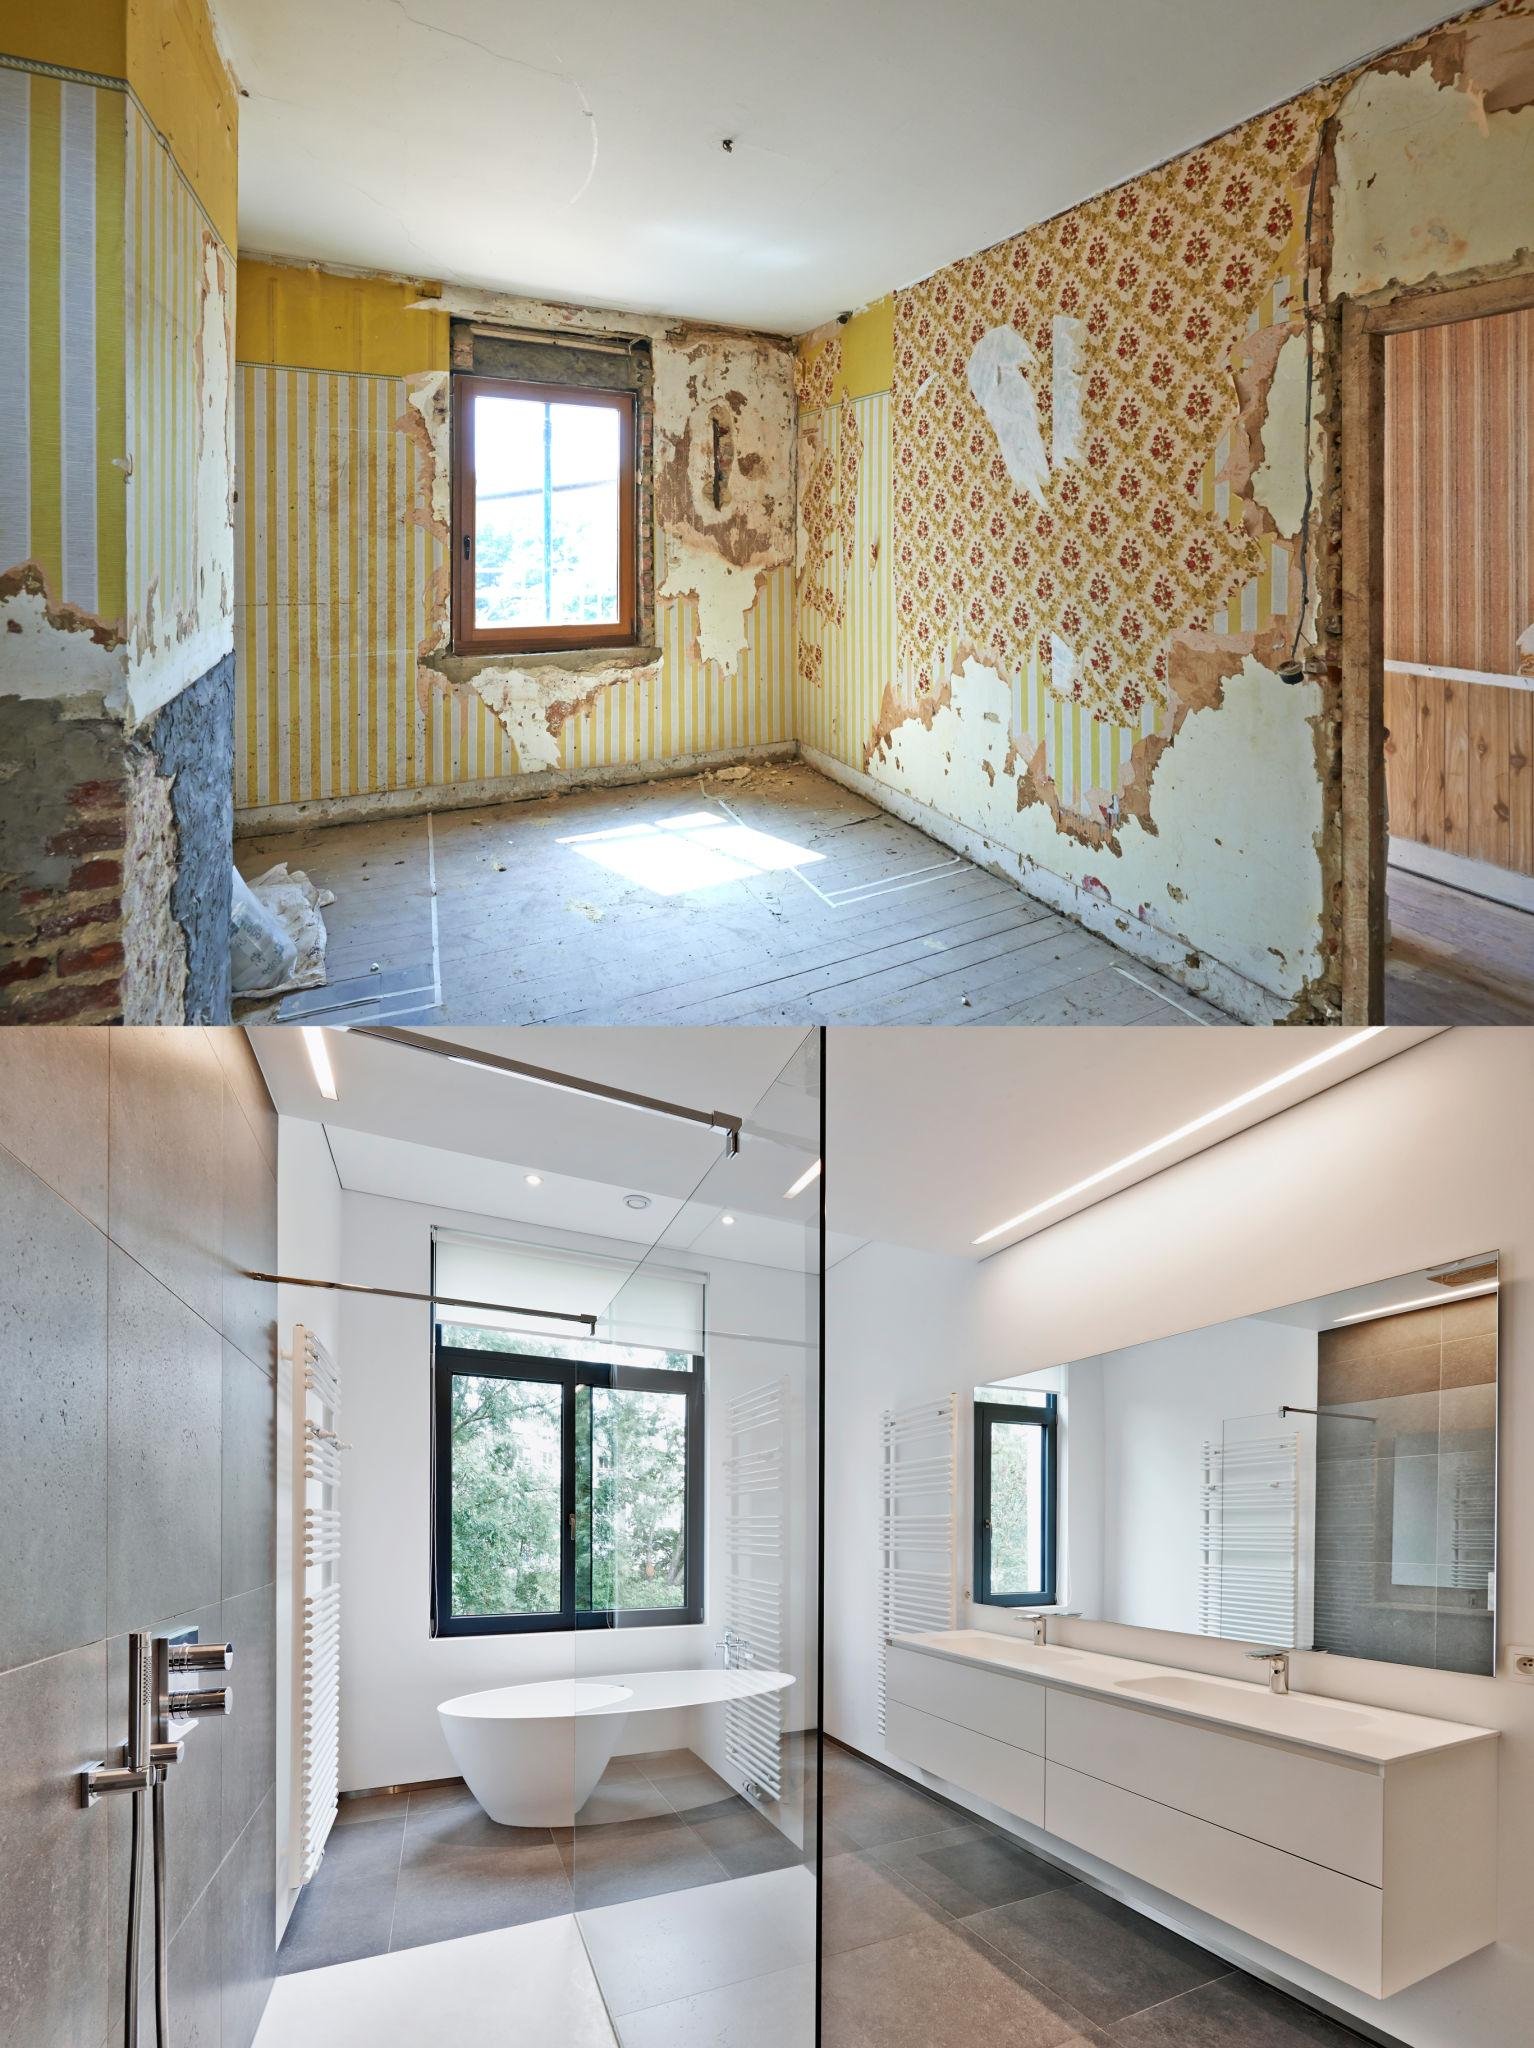
    A renovation focuses on improving what already exists. It is ideal when your home’s layout works well, major systems are in good condition, and you mainly want to update the appearance. Projects like replacing flooring, upgrading finishes, repainting walls, or improving fixtures can completely refresh a home without major construction changes.

    RenovationFull Remodel
    Updates existing spacesChanges structure or function
    Focuses on appearance and improvementsFocuses on redesign and transformation
    Usually fewer construction changesOften involves major construction work
    Best for homes with good layoutsBest for homes with outdated designs or problems

    Signs Your Home Only Needs Renovation

    A renovation is often the right choice when your home still works well but feels outdated. Many homes do not need walls moved or major construction; they simply need modern finishes, better functionality, and updated features.

    If your home’s layout fits your lifestyle, rooms are properly sized, and major systems are working correctly, a renovation can provide a significant improvement without the expense and disruption of a full remodel. This approach allows homeowners to focus their budget on the areas that create the biggest visual and functional impact.

    Your Home Looks Outdated but Functions Well

    One of the clearest signs that your home needs renovation rather than remodeling is when the space works properly but no longer matches your style or modern expectations. For example, a kitchen may have enough space and storage but still feel old because of outdated cabinets, countertops, lighting, or finishes.

    In these situations, targeted improvements can create a completely refreshed look. Replacing worn flooring, updating fixtures, improving lighting, and modernizing surfaces can make the home feel new while keeping the original layout intact.

    Your Major Home Systems Are Still in Good Condition

    Before deciding on a full remodel, homeowners should consider the condition of important systems such as plumbing, electrical, HVAC, and structural components. If these areas are reliable and do not require major repairs, renovation is often a more practical option.

    Updating finishes and improving specific areas can deliver the results homeowners want without unnecessary construction. However, if problems such as leaks, structural damage, or outdated systems are discovered, the project may require Reconstruction and Remodeling to address deeper issues before cosmetic improvements begin.

    Questions to Ask Before Choosing Renovation or Remodeling

    Before deciding between renovation and a full remodel, homeowners should first understand what problems they want to solve. A renovation may be enough if the home only feels outdated, but a remodel may be necessary when the layout, functionality, or major systems no longer meet your needs. Evaluating your goals, budget, and the condition of your home can help you choose the right approach.

    Consider these questions before starting your project:

    • Does my current home layout work for my lifestyle?
    • Am I updating appearance or solving functional problems?
    • Are there hidden issues that need repairs?
    • Will this improvement add long-term value to my home?

    Home Areas That Often Require Remodeling

    Some areas of a home are more likely to need remodeling because they affect daily comfort and functionality. Kitchens, bathrooms, and entire living spaces often become outdated over time due to changing lifestyles, older materials, or inefficient designs. Updating these areas can improve both the appearance and usability of your home.

    Common remodeling areas include:

    • Kitchens with outdated layouts or limited storage
    • Bathrooms with old fixtures or poor functionality
    • Living spaces that need better flow or additional space

    Kitchen Remodeling

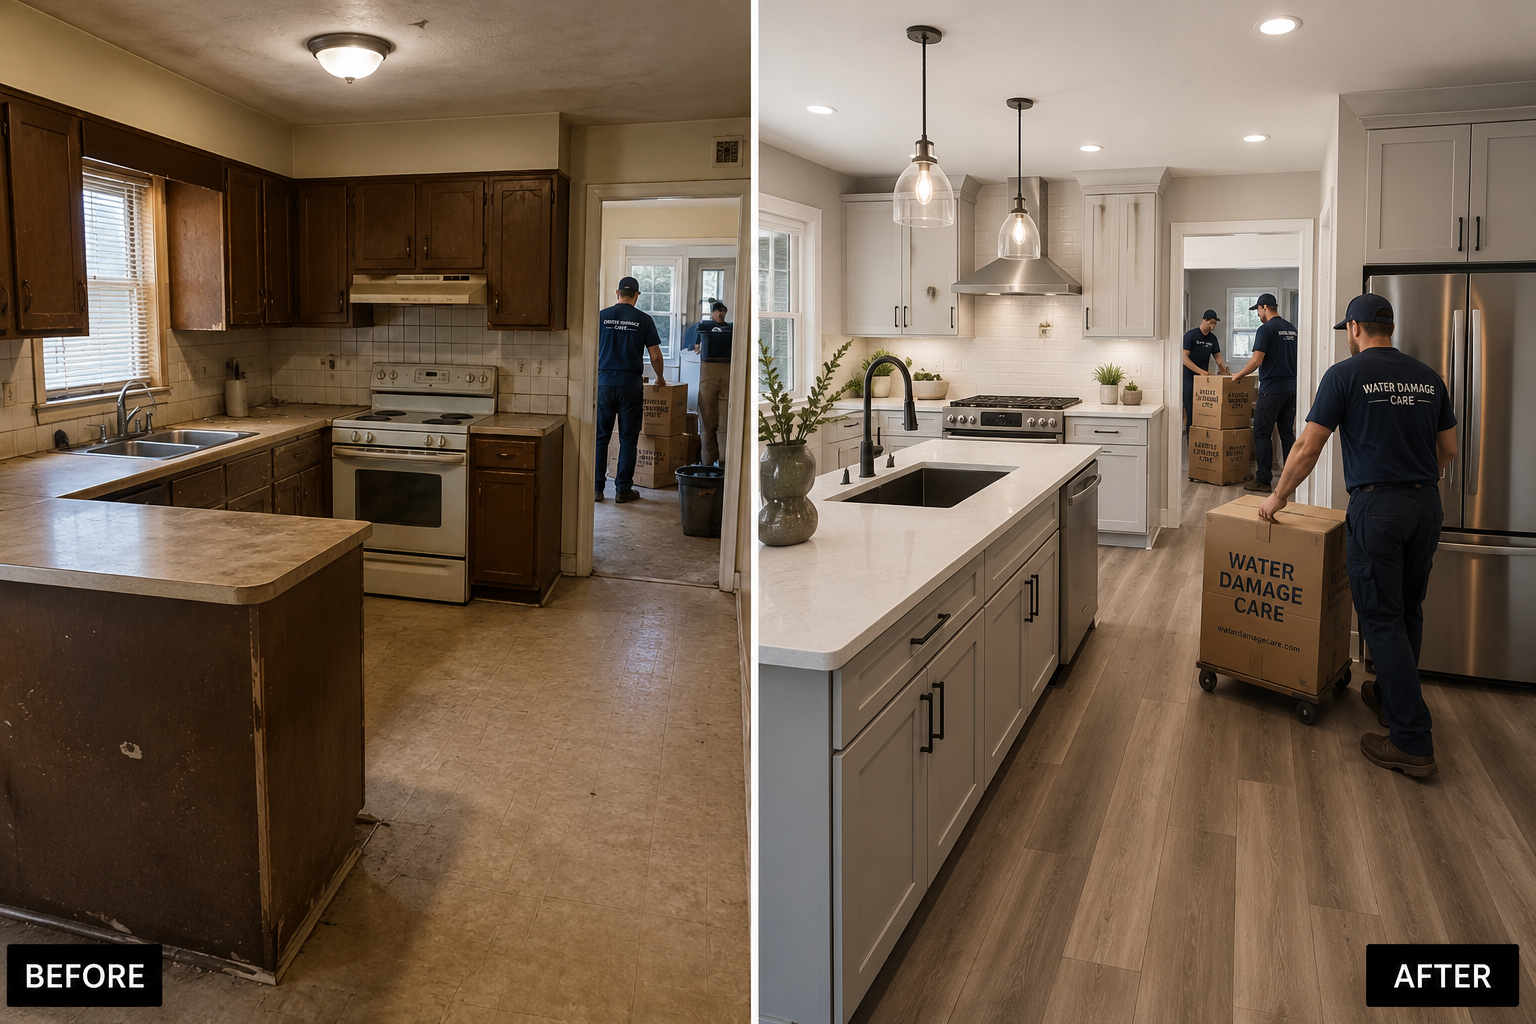
    The kitchen is one of the most common areas homeowners choose to remodel because it is often the center of daily activity. If your kitchen feels cramped, outdated, or difficult to use, a remodel can improve storage, workflow, and overall design. Changes may include updated cabinets, countertops, flooring, lighting, and layout improvements.

    A kitchen remodel may include:

    • Cabinet and countertop upgrades
    • Improved lighting and storage solutions
    • Updated flooring and modern finishes

    Bathroom Remodeling

    Bathrooms often require remodeling when outdated designs, damaged materials, or poor layouts affect comfort and functionality. A bathroom remodel can improve the space by upgrading fixtures, improving storage, replacing old surfaces, and creating a more modern design. If hidden moisture problems or damage are discovered, additional repairs may be needed before completing the upgrades.

    Bathroom improvements may include:

    • New showers, tubs, and fixtures
    • Updated flooring and tile
    • Better storage and improved layouts

    Whole-Home Remodeling

    A whole-home remodel is usually considered when multiple areas of the house need major improvements. Instead of updating one room, this approach allows homeowners to create a consistent design, improve functionality, and address outdated systems throughout the property.

    A whole-home remodel may involve:

    • Multiple room upgrades
    • Layout changes
    • Electrical, plumbing, or structural improvements
    • Complete interior transformation

    Hidden Issues That Can Change a Renovation Into a Remodel

    Sometimes a project that starts as a simple renovation becomes a larger remodel after hidden problems are discovered. Issues behind walls, under flooring, or inside ceilings can increase the project scope and require additional repairs before cosmetic improvements can continue.

    Common hidden problems include:

    • Water damage or mold
    • Damaged framing or subfloors
    • Outdated electrical or plumbing systems

    When major damage affects the structure of your home, Reconstruction and Remodeling may be needed to restore the affected areas before finishing the renovation.


    How to Decide Which Option Is Right for Your Home

    The right choice depends on your home’s condition, your goals, and the type of improvements you want to make. If your home functions well but looks outdated, renovation may provide the results you need. If you are dealing with layout problems, major repairs, or outdated systems, a full remodel may offer better long-term value.

    SituationRecommended Option
    Outdated finishes and fixturesRenovation
    Poor layout or limited functionalityRemodel
    Major system problemsRemodel
    Cosmetic improvements onlyRenovation

    Benefits of Working With a Professional Remodeling Contractor

    A professional contractor can help you understand whether your home needs renovation or remodeling by evaluating the current condition and identifying potential challenges. Experienced professionals can also manage planning, materials, construction steps, and unexpected issues to help keep the project organized.

    Working with a professional helps with:

    • Accurate project planning
    • Quality installation
    • Proper handling of unexpected problems
    • Better long-term results

    conclusion

    Understanding whether your home needs renovation or a full remodel helps you make smarter decisions with your time and budget. Simple updates may be enough for homes with good layouts and working systems, while larger remodeling projects are better for homes that need functional improvements or major repairs. A proper evaluation before starting can help you create a home that better fits your needs.

    FAQs

    What is the difference between renovation and remodeling?

    Renovation updates existing features, while remodeling changes the structure, layout, or function of a home.

    How do I know if my home needs a full remodel?

    Your home may need remodeling if it has poor layouts, outdated systems, structural issues, or major functionality problems.

    Is renovating a house cheaper than remodeling?

    Yes, renovations are usually less expensive because they focus on improvements without major structural changes.

    What are signs my home needs renovation?

    Outdated finishes, old fixtures, worn flooring, and cosmetic issues are common signs your home needs renovation.

    Does remodeling increase home value?

    A well-planned remodel can improve comfort, functionality, and the resale value of your home.

    Should I renovate or remodel my kitchen?

    If the layout works but looks outdated, renovate. If the space is inefficient, a remodel may be better.

    Can hidden damage turn a renovation into a remodel?

    Yes, issues like water damage, mold, or structural problems can increase the project scope.

    Reference

  • How Long Does a Bathroom Remodel Take? A Complete Timeline Guide

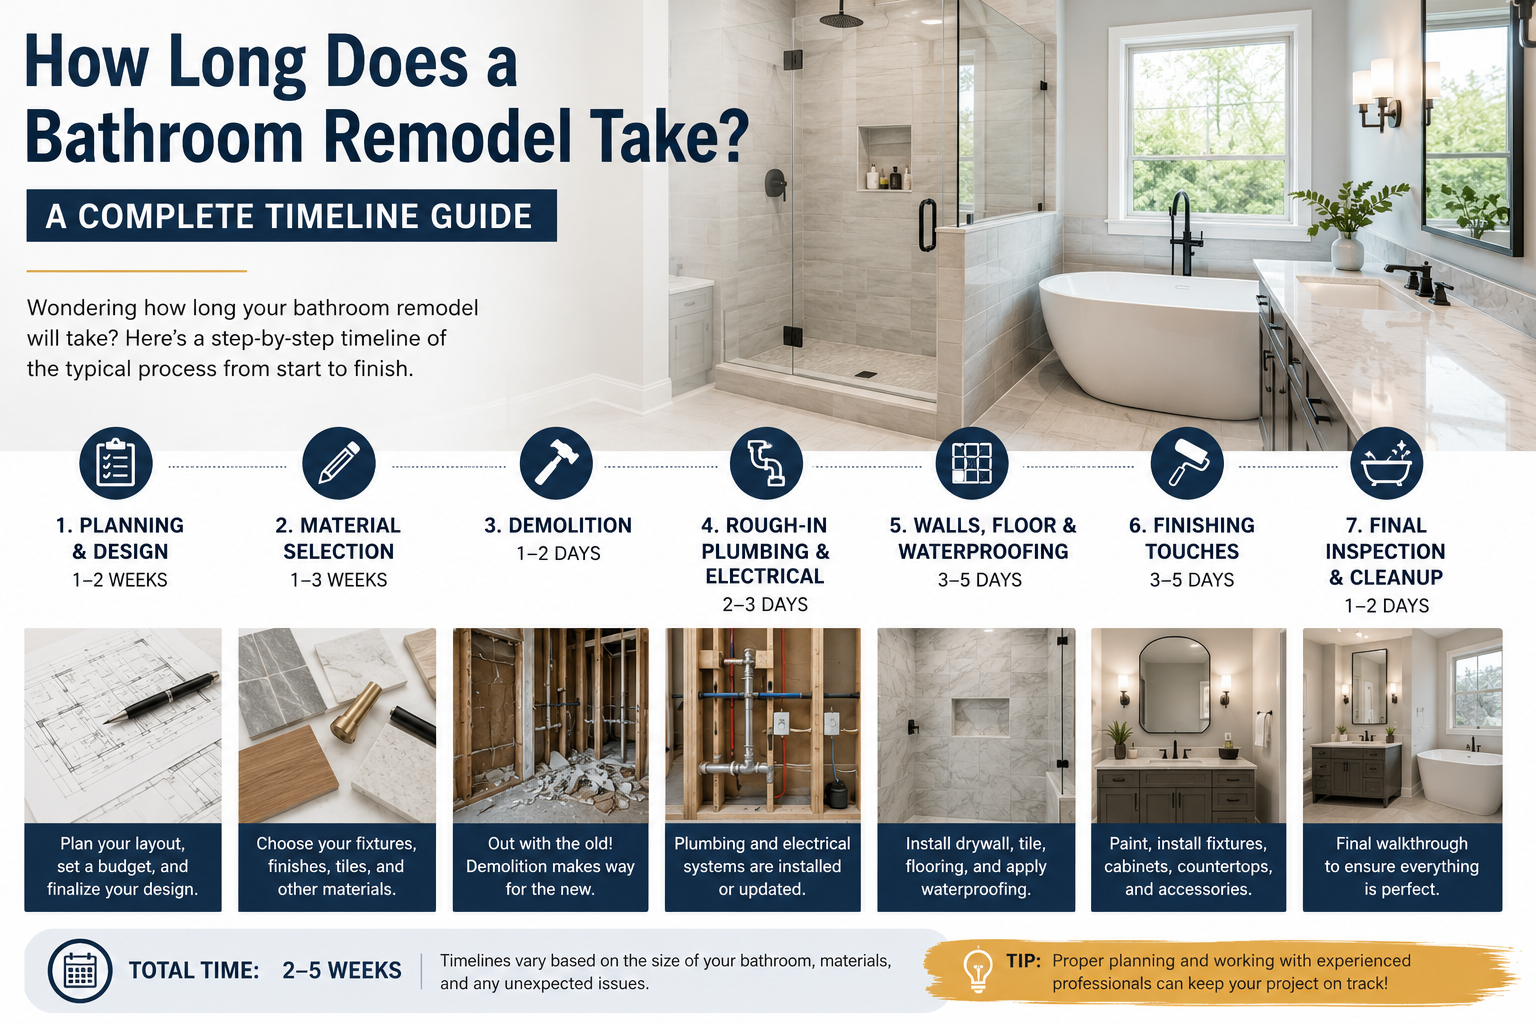
    How Long Does a Bathroom Remodel Take? A Complete Timeline Guide

    A bathroom remodel typically takes 3 to 8 weeks, depending on the bathroom size, project complexity, materials, and required repairs. Simple updates like replacing fixtures may take only a few weeks, while complete renovations involving plumbing, electrical work, tile installation, or structural repairs can take several months.

    How Long Does a Bathroom Remodel Take?

    A typical bathroom remodel takes around 3 to 8 weeks to complete, depending on the size of the bathroom, scope of work, material availability, and the complexity of the project. Simple updates like replacing fixtures or repainting may take only a few weeks, while a complete renovation with plumbing changes, custom features, and structural improvements can take much longer.

    The timeline of a bathroom renovation is not only based on construction work. Planning, material selection, inspections, and unexpected issues discovered during the project can also affect the completion date.

    Most bathroom remodeling projects follow several important stages, including:

    • Planning and design
    • Material selection and ordering
    • Demolition and preparation
    • Plumbing and electrical work
    • Installation and finishing

    A well-planned project with clear decisions and experienced professionals usually moves more efficiently because delays are reduced before construction begins.


    Average Bathroom Remodel Timeline by Project Type

    The time required for a bathroom remodel depends heavily on the type of renovation you are planning. A cosmetic update requires less time because it focuses on surface improvements, while a full remodel may involve changing the layout, updating plumbing, or replacing major components.

    Understanding the difference between project types helps homeowners set realistic expectations before starting their renovation.


    Small Bathroom Remodel Timeline

    A small bathroom remodel usually takes around 1 to 3 weeks when the project involves minor updates rather than major construction. These projects often focus on improving the appearance and functionality without changing the existing layout.

    Common updates include:

    • Replacing bathroom fixtures
    • Installing a new vanity
    • Updating lighting
    • Repainting walls
    • Replacing flooring

    Since these projects typically require less demolition and fewer material changes, they can often be completed faster. However, delays can still occur if materials are unavailable or hidden problems are discovered during the renovation.


    Standard Bathroom Renovation Timeline

    A standard bathroom renovation generally takes about 3 to 6 weeks because it involves more detailed work and multiple installation stages. These projects often include upgrades that improve both appearance and performance.

    A typical renovation may involve:

    • Shower or bathtub replacement
    • Tile installation
    • Flooring upgrades
    • Plumbing improvements
    • New cabinets and fixtures

    During this type of remodel, coordination between different professionals is important. Proper scheduling helps ensure that plumbing, electrical work, waterproofing, and finishing tasks are completed in the correct order.


    Large or Luxury Bathroom Remodel Timeline

    A large or luxury bathroom remodel can take 6 to 12 weeks or longer, especially when the project includes custom designs, premium materials, or major layout changes.

    Luxury renovations often involve more detailed planning and specialized installation work, such as:

    • Custom cabinetry
    • High-end tile patterns
    • Walk-in showers
    • Freestanding tubs
    • Advanced lighting systems
    • Layout modifications

    Projects with significant changes may require additional preparation and construction work. If major damage is discovered behind walls or beneath flooring, Reconstruction and Remodeling may be needed before the bathroom upgrades can continue.


    Stages of a Bathroom Remodeling Project

    A bathroom remodel follows a step-by-step process, and each stage contributes to the overall timeline. Understanding these phases helps homeowners know what to expect during construction.


    Planning and Design Phase

    The planning stage is one of the most important parts of a bathroom renovation. This phase usually includes creating a design, setting a budget, choosing materials, and deciding on the overall style of the bathroom.

    Although planning does not involve physical construction, it can significantly affect the project timeline. Delays in selecting tiles, fixtures, cabinets, or finishes can slow down the entire remodeling process.

    During this stage, homeowners typically decide:

    • Bathroom layout changes
    • Flooring and tile selections
    • Fixtures and finishes
    • Storage solutions
    • Project budget and timeline

    Completing these decisions early helps prevent unnecessary delays once construction begins.


    Demolition and Preparation Phase

    The demolition phase is when the existing bathroom is removed and prepared for renovation. This stage may involve removing old flooring, fixtures, cabinets, tile, and other outdated materials.

    The length of demolition depends on the condition of the existing bathroom and the amount of work required. Older bathrooms may require additional inspection because hidden issues are often discovered after walls or flooring are opened.

    Common preparation work includes:

    • Removing old fixtures
    • Preparing walls and floors
    • Checking plumbing conditions
    • Inspecting moisture damage
    • Preparing surfaces for installation

    Proper preparation creates a strong foundation for the new bathroom and helps prevent future problems.

    Installation and Construction Phase

    The installation phase is where the new bathroom begins to take shape. This stage usually takes the most time because multiple tasks must be completed in the correct order, including plumbing, electrical work, waterproofing, flooring, fixtures, and finishing details.

    The timeline depends on the complexity of the renovation. A simple bathroom update may move quickly, while projects involving layout changes or upgraded features require additional coordination between different trades.

    Common installation tasks include:

    • Plumbing updates and fixture installation
    • Electrical improvements and lighting installation
    • Shower, bathtub, and vanity installation
    • Tile and flooring installation
    • Painting and final finishing work

    Proper scheduling during this phase helps prevent delays and ensures each part of the bathroom is completed correctly.


    Factors That Affect Bathroom Remodel Timeline

    While many bathroom remodels follow a similar process, every project has unique challenges that can affect the completion date. The size of the bathroom, selected materials, labor availability, and unexpected repairs all play a role in determining how long the renovation takes.

    Understanding these factors helps homeowners prepare for possible delays and create a more realistic remodeling schedule.


    Bathroom Size and Project Complexity

    The size and complexity of a bathroom are major factors that influence the remodeling timeline. A small guest bathroom with simple upgrades can often be completed quickly, while a large master bathroom renovation may require several additional weeks.

    Projects become more time-consuming when homeowners change the existing layout, move plumbing fixtures, or add custom features.

    Factors that increase project time include:

    • Changing the bathroom layout
    • Moving plumbing connections
    • Installing custom materials
    • Adding built-in storage
    • Completing detailed tile designs

    A clear plan before construction begins can help reduce unnecessary delays and keep the project moving efficiently.


    Material Availability

    The availability of materials can have a significant impact on how long a bathroom remodel takes. Even when construction is progressing smoothly, waiting for special-order products can delay completion.

    Popular bathroom materials such as custom tiles, cabinets, countertops, and specialty fixtures may require additional ordering time.

    Homeowners can reduce material-related delays by:

    • Selecting materials before construction begins
    • Ordering products early
    • Confirming delivery schedules
    • Choosing available alternatives when necessary

    Planning material selections ahead of time allows contractors to maintain a more consistent remodeling schedule.


    Unexpected Repairs During Remodeling

    Unexpected problems are one of the most common reasons bathroom remodeling projects take longer than expected. Once walls, floors, or fixtures are removed, contractors may discover hidden issues that were not visible before construction began.

    Common hidden problems include:

    • Water damage behind walls
    • Plumbing leaks
    • Damaged subfloors
    • Mold growth
    • Electrical issues

    These problems must be repaired before completing the bathroom renovation to ensure safety and long-term durability. In cases involving significant damage, Reconstruction and Remodeling may be required to restore affected areas before finishing the bathroom upgrade.


    How to Avoid Delays During a Bathroom Remodel

    Although some delays are unavoidable, proper planning can help homeowners complete their bathroom renovation more efficiently. A clear schedule, early decision-making, and communication with your contractor can make the entire process smoother.

    Homeowners can reduce delays by:

    • Finalizing the design before construction starts
    • Choosing materials early
    • Working with experienced professionals
    • Maintaining clear communication
    • Preparing for unexpected repairs

    Having realistic expectations also helps prevent frustration during the remodeling process. Quality work requires proper time for installation, inspections, and finishing details.


    Can You Use Your Bathroom During Remodeling?

    Whether you can use your bathroom during a remodel depends on the amount of work being completed. Minor updates may allow limited use, but full renovations usually require the bathroom to be unavailable for part or all of the project.

    During major remodeling projects, homeowners may need alternative arrangements, especially when plumbing, flooring, or shower areas are being replaced.

    Factors that determine bathroom availability include:

    • Whether the toilet remains connected
    • Plumbing work requirements
    • Flooring and tile installation
    • Electrical upgrades
    • Number of bathrooms in the home

    Planning ahead can make the renovation period more comfortable, especially for families with only one bathroom.


    Professional Bathroom Remodeling vs DIY Timeline

    DIY bathroom remodeling may seem like a way to save money, but it often takes significantly longer without professional experience, tools, and project management skills.

    Professional contractors understand the correct order of construction tasks, building requirements, and installation techniques needed to complete a bathroom efficiently.

    Professional remodeling offers benefits such as:

    • Faster project completion
    • Proper installation methods
    • Better quality control
    • Knowledge of building standards
    • Reduced risk of costly mistakes

    For complex renovations involving plumbing changes, structural repairs, or extensive upgrades, professional installation can help ensure the project is completed correctly.


    How to Plan Your Bathroom Remodel Successfully

    A successful bathroom remodel begins with careful planning. Before construction starts, homeowners should understand their goals, budget, preferred materials, and expected timeline.

    A well-organized remodeling plan can help prevent delays and create a smoother renovation experience.

    Important planning steps include:

    • Creating a realistic budget
    • Selecting materials in advance
    • Choosing a qualified contractor
    • Understanding the remodeling process
    • Preparing for possible unexpected repairs

    With proper preparation and professional guidance, most bathroom remodeling projects can be completed within a predictable timeframe while achieving the desired results.


    conclusion

    The answer to “How long does a bathroom remodel take?” depends on the size of the project, materials selected, and the amount of work required. Most bathroom renovations take between 3 and 8 weeks, while larger projects with custom features or repairs may require additional time.

    Planning ahead, selecting materials early, and working with experienced professionals can help reduce delays and create a smoother remodeling experience. A properly completed bathroom renovation improves comfort, functionality, and long-term value for your home.

    FAQs

    How long does a bathroom remodel take?

    A bathroom remodel usually takes 3 to 8 weeks, depending on the project size, materials, and required upgrades.

    Can a bathroom remodel be completed in two weeks?

    Small cosmetic updates may take around two weeks, but full renovations usually require more time.

    What takes the longest during a bathroom renovation?

    Plumbing changes, custom materials, tile installation, and unexpected repairs often take the most time.

    How long does a small bathroom remodel take?

    A small bathroom remodel can often be completed within 1 to 3 weeks if no major repairs are needed.

    Do plumbing changes increase bathroom remodel time?

    Yes, moving plumbing lines or upgrading systems can add extra time to the renovation schedule.

    What causes bathroom remodeling delays?

    Material shortages, design changes, hidden damage, and inspection requirements can extend the timeline.

    Can I stay home during a bathroom remodel?

    Yes, but access may be limited, especially during demolition, plumbing work, and flooring installation.


    Reference

  • How Much Does Flooring Installation Cost in Rockville, MD?

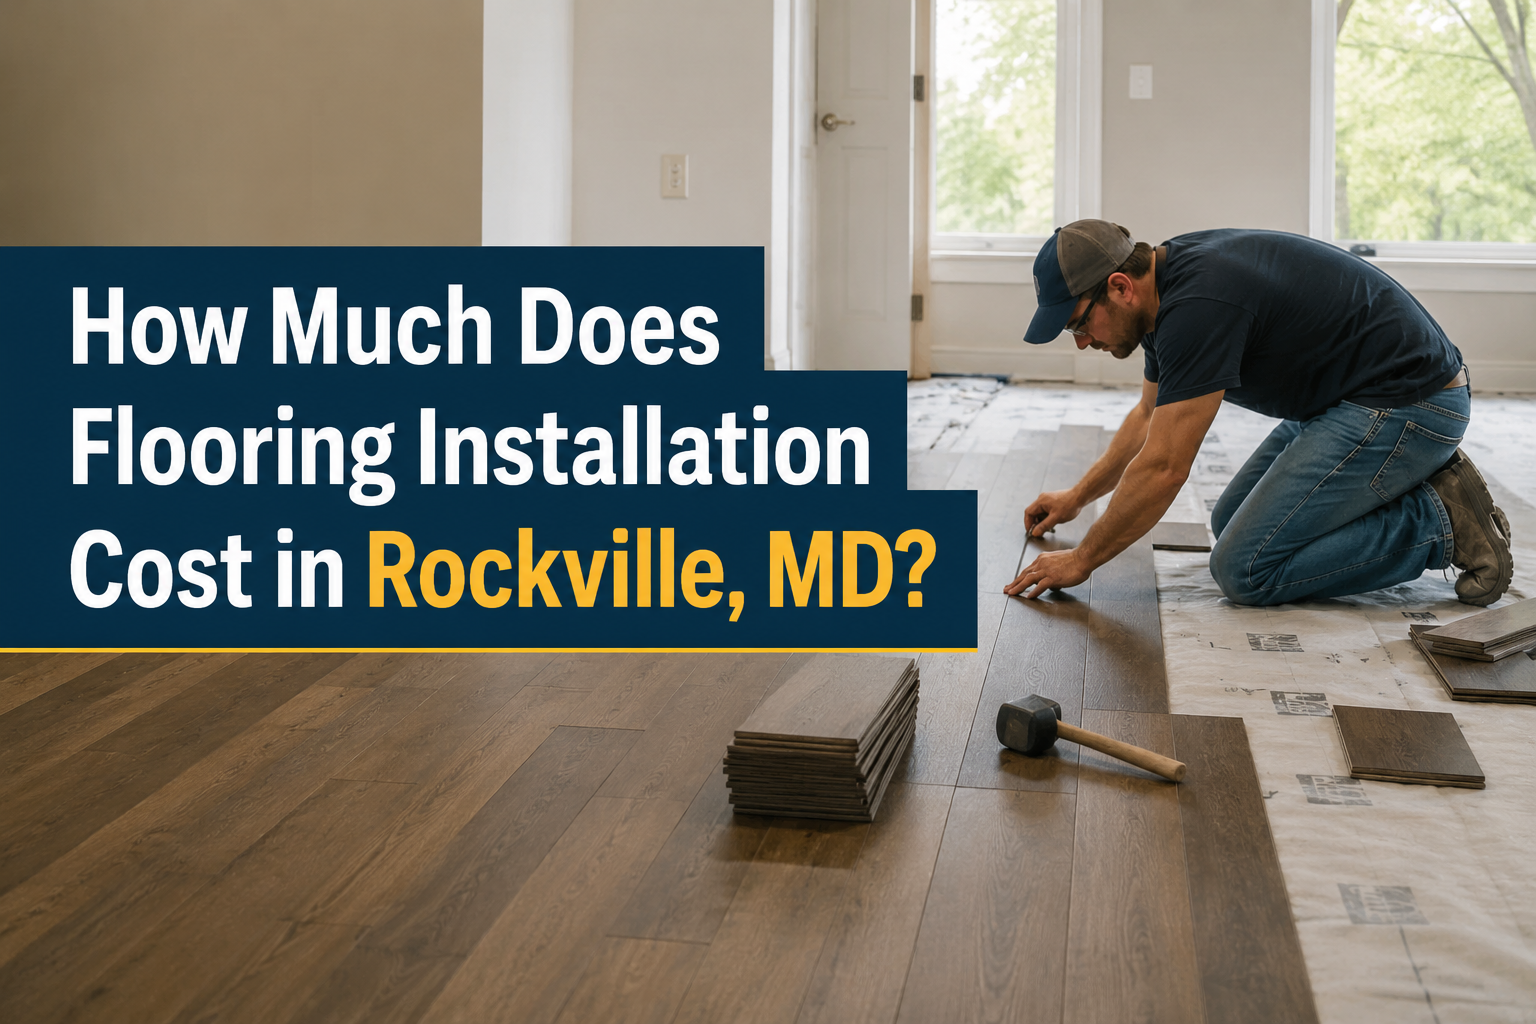
    How Much Does Flooring Installation Cost in Rockville, MD?

    How much does flooring installation cost in Rockville, MD? Flooring installation in Rockville, MD, typically costs between $4 and $15 per square foot, depending on the flooring material, labor rates, room size, and subfloor condition. Premium materials like hardwood and tile cost more, while laminate and luxury vinyl plank are generally more budget-friendly.

    Average Flooring Installation Cost in Rockville, MD

    The cost of flooring installation in Rockville, MD, depends on several factors, including the type of flooring, size of the project, labor requirements, and the condition of the existing floor. On average, homeowners can expect to pay around $4 to $15 per square foot for professional flooring installation, including both materials and labor.

    For a standard room, the total cost can vary significantly depending on the flooring material selected. A simple laminate or luxury vinyl installation may be more budget-friendly, while hardwood, tile, or specialty flooring options usually require a higher investment because of material costs and more detailed installation work.

    Several factors can influence your final flooring installation estimate, including:

    • Flooring material and quality
    • Total square footage
    • Labor complexity
    • Removal of existing flooring
    • Subfloor preparation requirements
    • Finishing details such as trim and baseboards

    What Factors Affect Flooring Installation Costs?

    Every flooring project is different, which is why installation prices can vary from one home to another. A contractor will typically evaluate the room condition, flooring type, and installation requirements before providing an accurate estimate.

    The biggest cost differences usually come from the material selected, the amount of preparation needed, and the complexity of the installation process.

    Flooring Material

    The type of flooring you choose has one of the biggest impacts on the overall project cost. Each material has different pricing, durability, maintenance needs, and installation requirements.

    For example, luxury vinyl plank (LVP) and laminate flooring are popular choices for homeowners looking for durability at a lower price point. Hardwood flooring and natural stone tile typically cost more because of material quality, installation techniques, and finishing requirements.

    Common flooring options include:

    • Hardwood flooring for a classic and long-lasting appearance
    • Luxury vinyl plank for moisture resistance and easy maintenance
    • Laminate flooring for affordable style options
    • Ceramic or porcelain tile for bathrooms, kitchens, and high-moisture areas
    • Carpet for bedrooms and comfortable living spaces

    The best flooring choice depends on your budget, lifestyle, room usage, and long-term goals for your home.


    Room Size and Layout

    The size and design of a room also affect flooring installation costs. Larger areas require more materials and labor, but smaller or complicated spaces may require additional cutting and detailed work that increases installation time.

    Rooms with unusual layouts, multiple corners, closets, stairs, or transitions between different flooring types often require more precision during installation.

    Before installation begins, professionals usually measure:

    • Total square footage
    • Room shape and layout
    • Number of transitions between flooring types
    • Areas requiring additional finishing work

    Accurate measurements help prevent material shortages and unexpected expenses during the project.


    Condition of the Existing Floor

    The condition of your current flooring and subfloor can significantly affect installation costs. If the existing surface is damaged, uneven, or affected by moisture, additional preparation may be necessary before installing new flooring.

    A properly prepared surface helps prevent problems such as uneven flooring, movement, squeaking, or premature damage after installation.

    Common preparation work may include:

    • Removing old flooring materials
    • Repairing damaged subfloors
    • Leveling uneven surfaces
    • Installing underlayment or moisture barriers
    • Addressing hidden structural issues

    If major damage is discovered beneath the flooring, additional Reconstruction and Remodeling may be required to restore the area before new flooring can be installed safely.


    Flooring Installation Cost by Material

    Choosing the right flooring material is one of the most important decisions when planning your project. Each option offers different benefits in terms of cost, durability, appearance, and maintenance requirements.

    Flooring TypeAverage Installed CostDurabilityBest For
    HardwoodHigher cost optionLong-lastingLiving rooms, dining areas, premium upgrades
    Engineered HardwoodModerate to highDurable and stableHomes needing natural wood appearance
    Luxury Vinyl Plank (LVP)Budget-friendly to moderateWater-resistant and durableKitchens, basements, busy areas
    LaminateAffordableGood durabilityBudget-conscious renovations
    Ceramic TileModerate to highExtremely durableBathrooms and kitchens
    Porcelain TileHigher costVery durableHigh-traffic and moisture areas
    CarpetLower to moderateComfortableBedrooms and living spaces

    While material pricing is important, homeowners should also consider installation requirements, maintenance costs, and expected lifespan. A slightly higher upfront investment may provide better value over time through improved durability and fewer repairs.

    Hidden Costs Many Homeowners Don’t Expect

    When planning a flooring installation project, many homeowners focus only on the cost of flooring materials and labor. However, additional expenses can appear during the preparation and finishing stages. Understanding these potential costs helps you create a more accurate budget and avoid unexpected surprises.

    A professional flooring contractor will usually inspect the existing surface before installation begins. This inspection helps identify issues that may affect the final price, such as damaged subfloors, moisture problems, or the need for additional finishing work.

    Common additional costs may include:

    • Removing and disposing of old flooring
    • Repairing damaged subfloors
    • Installing underlayment or moisture barriers
    • Replacing baseboards or trim
    • Moving furniture before installation
    • Additional preparation for uneven surfaces

    Addressing these issues before installing new flooring helps ensure better performance and prevents future problems that could damage your investment.


    Is Professional Flooring Installation Worth the Cost?

    Many homeowners consider DIY flooring installation to save money, especially with materials like laminate or vinyl plank. While some flooring projects may appear simple, professional installation requires experience, proper tools, and knowledge of different installation methods.

    Professional installers understand how to prepare the surface, handle material expansion, create proper transitions, and avoid common mistakes that can affect the appearance and lifespan of your flooring.

    The benefits of professional flooring installation include:

    • Better installation quality and finishing details
    • Proper handling of complex layouts
    • Reduced risk of material damage
    • Faster project completion
    • Manufacturer warranty protection

    For larger projects or homes with damaged surfaces, hiring experienced professionals can help prevent costly repairs later. If flooring problems reveal deeper damage, homeowners may need Reconstruction and Remodeling services to restore the area properly before completing the flooring upgrade.


    How to Save Money Without Sacrificing Quality

    Reducing flooring installation costs does not always mean choosing the cheapest materials or lowest estimate. A smarter approach is to balance affordability, durability, and long-term maintenance needs.

    Homeowners can control costs by comparing options carefully and planning the project before installation begins. Choosing the right flooring for each room can also prevent unnecessary replacements in the future.

    Some practical ways to save include:

    • Compare multiple professional estimates
    • Choose durable materials that fit your lifestyle
    • Install flooring in phases if needed
    • Prepare the space before contractors arrive
    • Select cost-effective alternatives with similar appearances

    For example, luxury vinyl plank can provide the look of hardwood while offering better moisture resistance and a lower installation cost. The right material choice depends on where the flooring will be installed and how the space will be used.


    Does New Flooring Increase Home Value?

    New flooring can significantly improve the appearance, comfort, and overall appeal of a home. Since floors cover a large portion of the interior space, updated flooring can create a noticeable difference for both homeowners and potential buyers.

    High-quality flooring improvements may increase home value by improving:

    • Interior appearance and first impressions
    • Functionality of living spaces
    • Comfort and durability
    • Buyer interest during resale

    The return on investment depends on factors such as material selection, installation quality, and the overall condition of the property. Durable options like hardwood, engineered flooring, and quality luxury vinyl are often attractive choices because they combine appearance with long-term performance.


    How to Get an Accurate Flooring Installation Estimate

    A reliable flooring estimate should include more than just the price of materials. Professional contractors evaluate several details to determine the true cost of completing the project correctly.

    During an estimate, contractors typically review:

    • Room measurements and total square footage
    • Existing flooring condition
    • Subfloor stability
    • Material selection
    • Installation method
    • Removal and disposal requirements
    • Finishing details such as trim and transitions

    A detailed estimate helps homeowners understand where their money is going and prevents unexpected costs during the project.

    When comparing estimates, focus on experience, workmanship, materials, and overall value rather than selecting the lowest price alone.


    conclusion

    The cost of flooring installation in Rockville, MD, depends on many factors, including flooring type, room size, labor requirements, and the condition of the existing surface. While budget is important, choosing quality materials and professional installation can help ensure your flooring lasts for many years.

    Before starting your project, consider your home’s needs, the purpose of each room, and any preparation work required. A properly planned flooring installation can improve your home’s comfort, appearance, and long-term value.

    FAQs

    How much does flooring installation cost in Rockville, MD?

    Flooring installation in Rockville, MD, usually costs around $4 to $15 per square foot, depending on the material, labor, and preparation work.

    What is the cheapest flooring to install?

    Laminate and luxury vinyl plank are usually among the most affordable flooring options while still offering durability and style.

    How long does flooring installation take?

    Most flooring projects take 1–3 days, but larger homes or projects requiring subfloor repairs may take longer.

    Does old flooring removal increase the cost?

    Yes, removing and disposing of existing flooring can add to the total installation cost.

    Is hardwood flooring more expensive than vinyl?

    Yes, hardwood generally costs more than vinyl because of material quality, installation requirements, and long-term durability.

    Should I repair my subfloor before installing new flooring?

    Yes, damaged or uneven subfloors should be repaired to prevent future flooring problems.

    Can new flooring increase my home’s value?

    Quality flooring can improve your home’s appearance, comfort, and resale appeal when professionally installed.

    Reference

  • How Much Does It Cost to Repair a Fire Damaged House? Cost Breakdown & Expert Guide

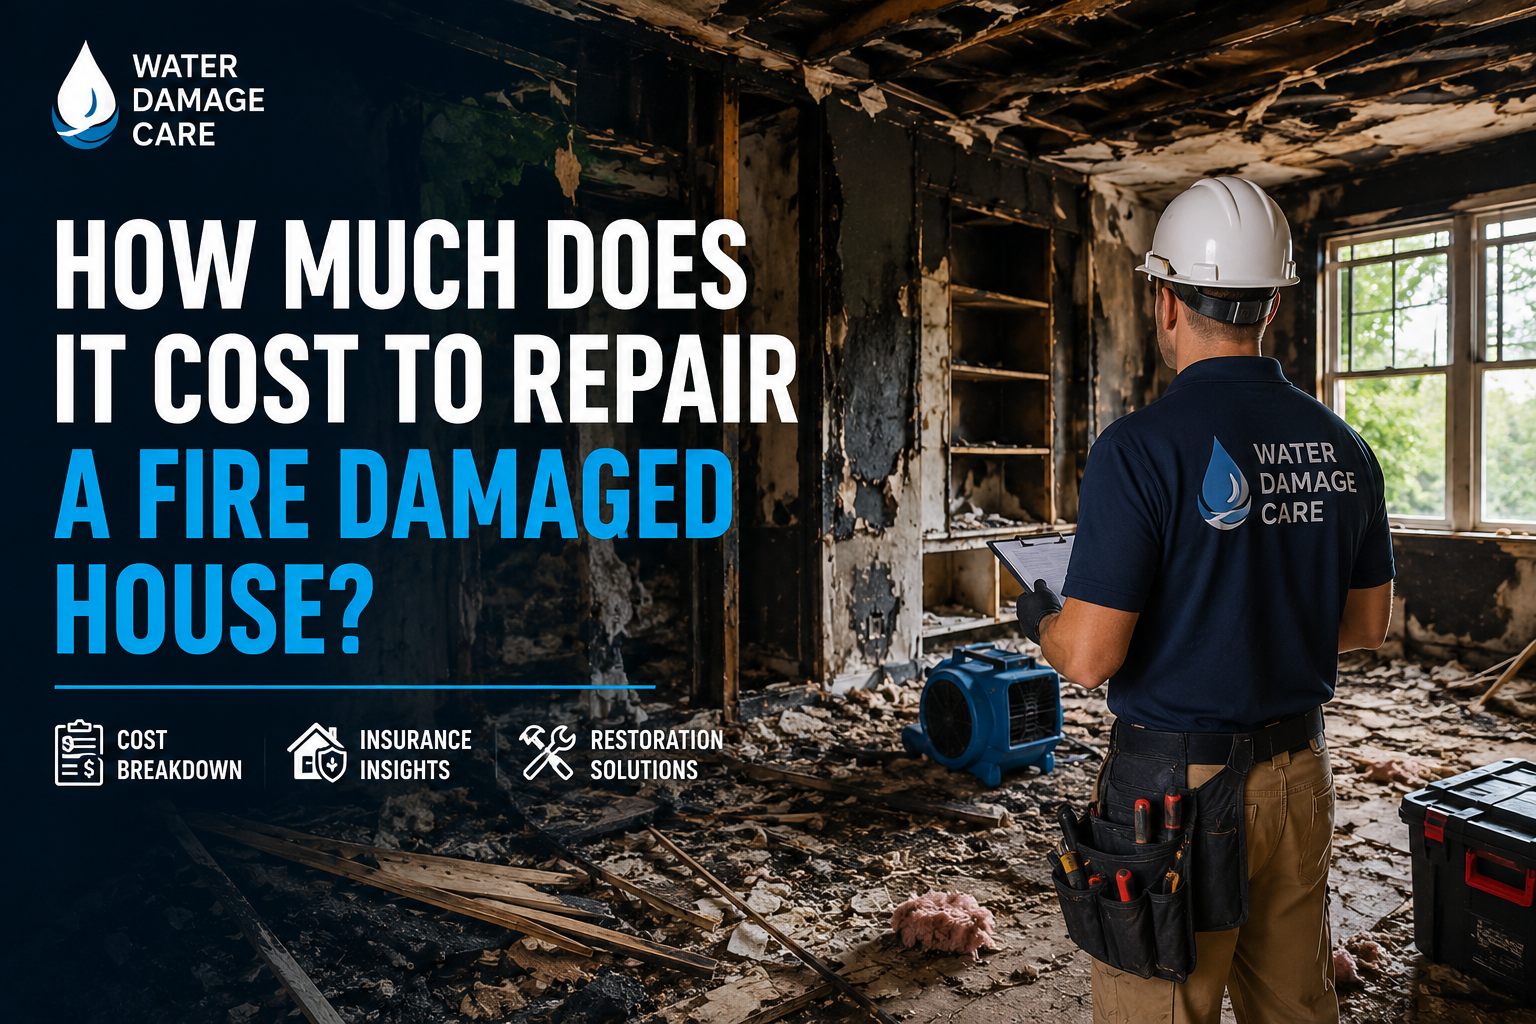
    How Much Does It Cost to Repair a Fire Damaged House? Cost Breakdown & Expert Guide

    The cost to repair a fire damaged house typically ranges from $3,000 for minor repairs to more than $100,000 for severe structural damage. The final price depends on the extent of the fire, smoke and soot contamination, water damage from firefighting efforts, the size of the home, and the repairs required to restore the property safely. A professional inspection is the best way to determine the actual cost of your specific project.

    Fire damage often extends beyond what is immediately visible. Even if the flames affected only one room, smoke, soot, heat, and water can impact walls, ceilings, flooring, electrical systems, and structural components throughout the home. Understanding the factors that influence repair costs helps homeowners make informed decisions and plan the restoration process.


    Average Cost to Repair a Fire Damaged House

    No two fire damage restoration projects are the same. A small kitchen fire may only require smoke cleanup and replacing damaged drywall, while a larger fire can involve rebuilding multiple rooms or repairing structural elements. The severity of the damage is the biggest factor in determining the overall repair cost.

    Professional restoration companies evaluate the entire property before preparing an estimate. This inspection identifies visible damage as well as hidden problems, ensuring every affected area is included in the restoration plan.

    Minor Fire Damage

    Minor fire damage is usually limited to a single room or a small section of the home. Repairs often include smoke and soot cleanup, odor removal, repainting, replacing drywall, and installing new flooring or trim where needed. Since the home’s structure remains intact, these projects are generally completed more quickly and at a lower cost.

    Moderate Fire Damage

    Moderate fire damage typically affects several rooms and may require replacing insulation, drywall, flooring, cabinets, windows, and portions of the electrical or plumbing systems. Smoke damage is usually more widespread, requiring professional cleaning throughout the home before repairs begin.

    Severe Fire Damage

    Severe fires can compromise the structural integrity of a home, resulting in extensive repairs or partial rebuilding. Damaged framing, roofing, load-bearing walls, and other structural components must be restored before the home is safe to occupy. Many homeowners in this situation also choose reconstruction and remodeling services to fully restore the property’s appearance, functionality, and long-term value.


    What Factors Affect Fire Damage Repair Costs?

    Several factors influence how much it costs to repair a fire damaged house. Understanding these variables can help homeowners estimate expenses before receiving a professional assessment.

    Extent of Structural Damage

    The more structural components affected by the fire, the higher the repair costs. Damage to framing, roof trusses, ceilings, or foundation elements requires specialized labor and materials, making these repairs significantly more expensive than cosmetic restoration.

    Smoke and Soot Damage

    Smoke and soot often travel well beyond the area touched by flames. Walls, ceilings, HVAC systems, furniture, and personal belongings may all require specialized cleaning to remove residue and eliminate lingering odors. The larger the affected area, the more time and labor the cleanup will require.

    Water Damage From Firefighting Efforts

    Water used to extinguish a fire can create additional damage inside the home. Saturated drywall, insulation, flooring, and wood framing should be dried quickly to reduce the risk of mold growth and further deterioration. Prompt water mitigation is an important part of the overall restoration process.

    Size of the Home

    Larger homes typically cost more to restore because they contain more materials, larger living spaces, and additional systems that must be inspected, cleaned, and repaired. Even when the fire is confined to one area, smoke and soot can spread throughout the property.


    Fire Damage Repair Cost Breakdown

    The following estimates provide a general idea of what homeowners may expect to pay for common fire damage restoration services.

    Repair ServiceEstimated Cost
    Smoke and Soot Cleanup$2,000–$6,000
    Water Extraction and Drying$1,500–$5,000
    Drywall Repair or Replacement$2–$6 per sq. ft.
    Flooring ReplacementVaries by material
    Electrical Repairs$1,000–$10,000+
    Roof Repairs$400–$8,000+
    Structural Repairs$5,000–$50,000+

    These estimates vary based on your location, the extent of the damage, labor rates, and the materials required for the restoration project.


    Is Repairing a Fire Damaged House Worth It?

    In many cases, repairing a fire damaged house is more cost-effective than rebuilding it from the ground up. If the structural framework remains sound, professional restoration can return the property to a safe, comfortable, and attractive condition. An experienced contractor can evaluate the damage and recommend the most practical solution based on safety, repair costs, and the home’s overall condition.

    What Is Included in Fire Damage Restoration?

    Repairing a fire damaged house involves much more than replacing burned materials. Professional restoration focuses on making the home safe, eliminating hidden damage, and restoring the property to its pre-loss condition. The exact services depend on the severity of the fire and the areas affected.

    Emergency Board-Up and Property Stabilization

    The first priority is securing the property to prevent further damage. Restoration professionals may board up broken windows, cover damaged sections of the roof, and stabilize unsafe areas before beginning the repair process. This helps protect the home from weather, theft, and additional structural deterioration.

    Smoke, Soot, and Odor Removal

    Smoke and soot can spread throughout the home within minutes, even in rooms untouched by flames. Professionals use specialized cleaning methods and deodorization equipment to remove residue from walls, ceilings, flooring, furniture, and HVAC systems. Eliminating smoke odors is essential before repairs and repainting begin.

    Water Extraction and Structural Drying

    Water used to extinguish the fire can cause significant secondary damage if it is not removed quickly. Restoration teams extract standing water, dry affected materials, and monitor moisture levels to reduce the risk of mold growth and structural deterioration.

    Repairs and Property Restoration

    Once cleanup is complete, damaged materials are repaired or replaced. This may include drywall, insulation, flooring, cabinets, roofing, electrical systems, plumbing, and interior finishes. Homes with extensive damage may also require reconstruction and remodeling to fully restore both safety and appearance.


    Does Homeowners Insurance Cover Fire Damage Repairs?

    In most cases, standard homeowners insurance policies cover fire damage caused by accidental events. Coverage generally includes structural repairs, smoke damage cleanup, debris removal, and, in many cases, temporary living expenses while the home is being restored. The amount paid depends on your policy limits, deductible, and the cause of the fire.

    Insurance companies usually require detailed documentation of the damage. Taking photographs, creating an inventory of damaged belongings, and working with a professional restoration contractor can help simplify the claims process and support a more accurate settlement.


    How to Reduce the Cost of Fire Damage Repairs

    Although fire damage restoration can be expensive, taking the right steps immediately after a fire may help reduce overall repair costs and prevent additional damage.

    Act Quickly

    Delaying cleanup allows smoke residue, soot, and moisture to cause further damage to walls, flooring, and personal belongings. Contacting a professional restoration company as soon as possible helps limit secondary damage.

    Prevent Additional Damage

    If it is safe to do so, protect the property from weather exposure by covering damaged areas and keeping the home secure until restoration professionals arrive. Preventing additional water intrusion or vandalism can reduce repair expenses.

    Hire Experienced Restoration Professionals

    Professional restoration companies have the equipment and expertise to identify hidden damage, clean affected areas thoroughly, and complete repairs according to industry standards. Proper restoration helps avoid costly problems that may develop months after the fire.


    When Is a House Too Damaged to Repair?

    Not every fire damaged home requires complete rebuilding. If the foundation and most of the structural framework remain intact, restoration is often the most practical and cost-effective solution. However, when major structural components are severely compromised, rebuilding part or all of the home may be necessary.

    A thorough inspection by qualified restoration professionals is the only reliable way to determine whether repairing or rebuilding the property is the better option. They evaluate structural stability, fire damage, smoke contamination, and repair costs before recommending the appropriate course of action.


    Why Professional Fire Damage Restoration Is Worth the Investment

    Fire damage is often more extensive than it appears. Hidden smoke residue, moisture trapped inside walls, weakened framing, and damaged electrical systems can create long-term safety concerns if repairs are incomplete. Professional restoration addresses both visible and hidden damage to help restore the home safely and efficiently.

    Investing in professional restoration also improves the quality of repairs, protects your property’s value, and reduces the likelihood of future problems. By combining expert cleanup, structural repairs, and reconstruction and remodeling when necessary, homeowners can restore their property with confidence.


    Conclusion

    The cost to repair a fire damaged house depends on the extent of the damage, the size of the property, and the repairs required. While minor fire damage may cost only a few thousand dollars to restore, severe structural damage can require a much larger investment. Acting quickly, working with experienced restoration professionals, and addressing both fire and water damage promptly can help reduce repair costs and return your home to a safe, livable condition.

    FAQs

    How much does it cost to repair a fire damaged house?

    The cost typically ranges from $3,000 to over $100,000, depending on the severity of the damage and the repairs required.

    Does homeowners insurance cover fire damage repairs?

    Yes. Most standard homeowners insurance policies cover accidental fire damage, subject to your policy limits and deductible.

    How long does it take to repair a fire damaged house?

    Minor repairs may take a few weeks, while extensive restoration and rebuilding can take several months.

    Can smoke damage be completely removed?

    Yes. Professional restoration companies use specialized equipment to remove smoke residue and eliminate lingering odors.

    Is it better to repair or rebuild after a fire?

    If the home’s structure is still sound, repairing is often more cost-effective than rebuilding from scratch.

    References

  • How Long Does Professional Flooring Installation Take? Timeline & Expert Guide

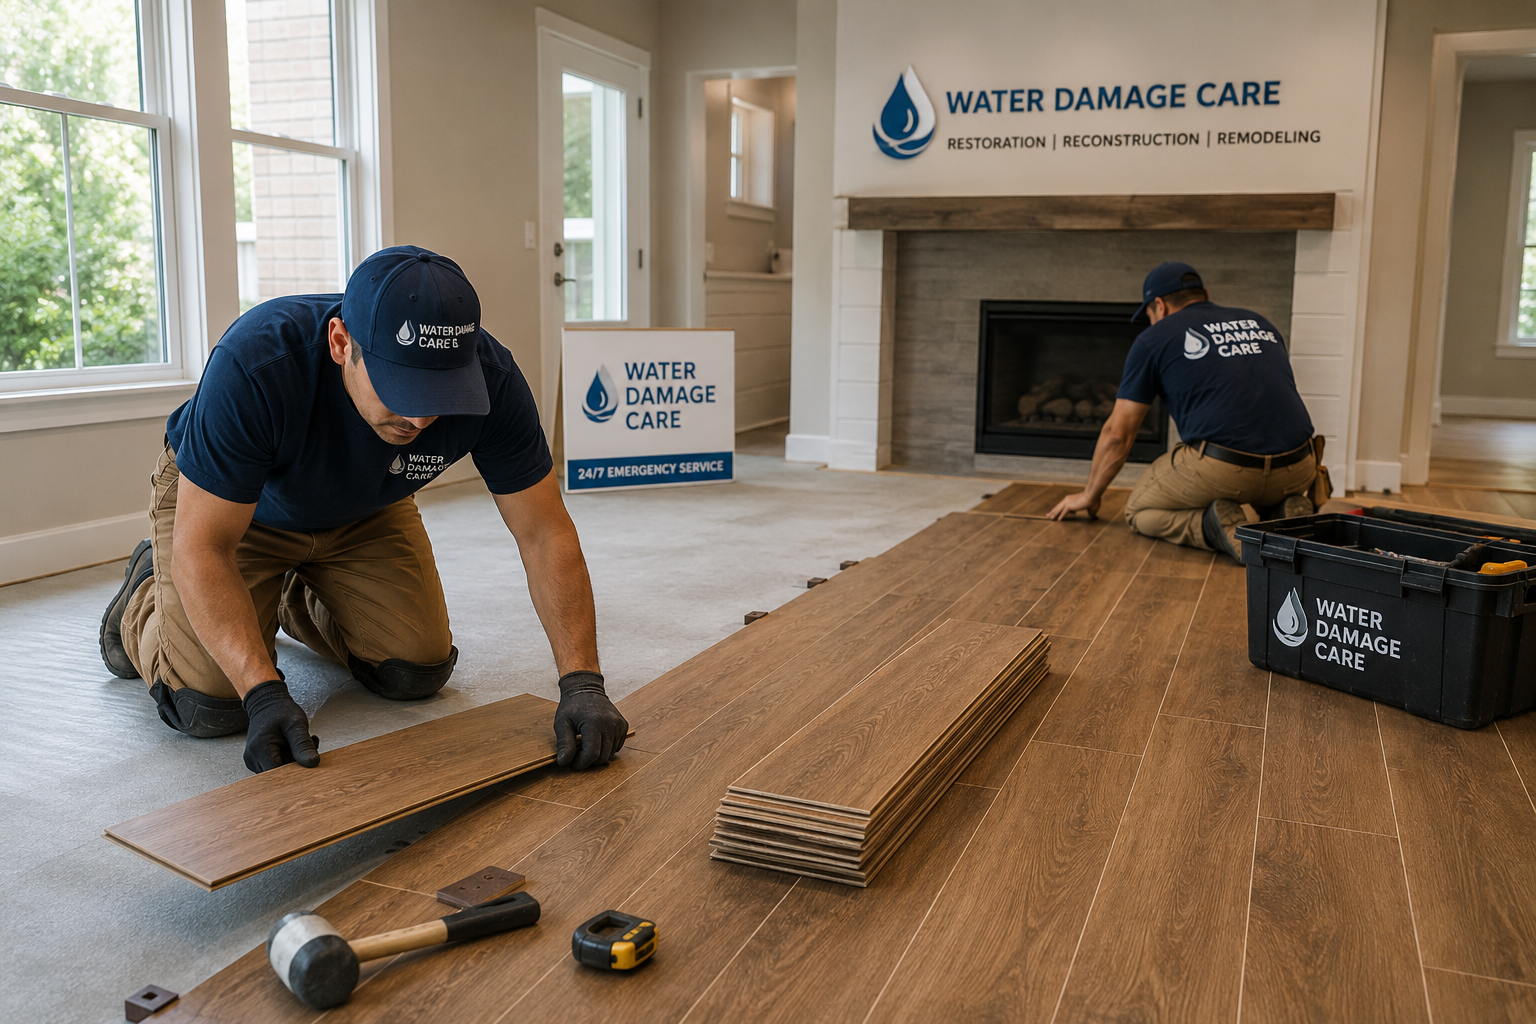
    How Long Does Professional Flooring Installation Take? Timeline & Expert Guide

    Professional flooring installation usually takes 1 to 5 days, depending on the flooring material, the size of the space, and the condition of the subfloor. While carpet, laminate, and luxury vinyl plank (LVP) can often be installed within a day or two, hardwood and tile flooring typically require additional time for preparation, installation, and finishing. Hiring experienced professionals helps ensure the work is completed efficiently without sacrificing quality.

    Every flooring project is different. Factors such as room layout, furniture removal, existing flooring, moisture levels, and subfloor condition all influence the installation schedule. Understanding these variables helps homeowners plan their project with confidence and avoid unnecessary delays.


    What Determines the Time Needed for Flooring Installation?

    There is no single timeline that applies to every flooring project. A small guest bedroom with laminate flooring may be completed in just one day, while installing hardwood throughout an entire home can take several days. Before work begins, professional installers evaluate the flooring material, the condition of the existing floor, and any preparation work required to create an accurate schedule.

    The focus is not simply on finishing the project quickly but on delivering a floor that performs well for years. Careful planning, proper installation techniques, and attention to detail help prevent common issues such as uneven surfaces, gaps, or premature wear.

    Average Installation Times by Flooring Type

    Different flooring materials require different installation methods, which directly affects the overall timeline.

    Flooring TypeAverage Installation Time
    CarpetAbout 1 day
    Luxury Vinyl Plank (LVP)1–2 days
    Laminate Flooring1–2 days
    Engineered Hardwood2–4 days
    Solid Hardwood3–5 days
    Ceramic or Porcelain Tile3–7 days

    Why Some Flooring Projects Take Longer

    Even when two homes use the same flooring material, installation times can vary. Larger spaces require more cutting and fitting, while complex room layouts, custom patterns, or staircases add additional labor. The condition of the home also plays an important role, especially if repairs are needed before installation begins.


    Factors That Can Affect Your Flooring Installation Timeline

    Several factors influence how quickly a professional installer can complete the project. Identifying these factors early helps reduce delays and keeps the installation process running smoothly.

    Flooring Material

    Each flooring type has its own installation process. Floating floors like laminate and LVP are generally quicker to install because they require fewer preparation steps. Hardwood flooring often involves additional fastening, sanding, or finishing, while tile installation includes setting, grouting, and curing time.

    Room Size and Layout

    The size of the installation area has a direct impact on the timeline. Larger rooms naturally require more labor, while spaces with multiple corners, built-in cabinets, or unusual layouts demand more precise measurements and cutting.

    Existing Flooring Removal

    Old flooring must often be removed before new materials can be installed. Carpet is usually the quickest to remove, whereas tile and hardwood can require significantly more time because of adhesives, nails, or damaged underlayment.

    Subfloor Preparation

    A stable, clean, and level subfloor is essential for a successful flooring installation. If moisture damage, uneven surfaces, or structural problems are discovered, they should be repaired before installation begins. In some cases, homeowners may also need reconstruction and remodeling services to restore the affected area and ensure the new flooring has a strong, long-lasting foundation.

    Acclimation and Drying Time

    Certain flooring materials require additional time before or after installation. Hardwood flooring often needs to acclimate to indoor temperature and humidity, while tile and glue-down flooring require curing time before they can safely handle regular foot traffic.


    Is Professional Flooring Installation Faster Than DIY?

    Many homeowners consider installing flooring themselves, but professional installation is typically much faster and produces more reliable results. Experienced installers use specialized equipment and proven techniques to complete projects efficiently while meeting manufacturer guidelines.

    DIY projects often take longer because homeowners must learn the installation process, prepare the subfloor, and correct mistakes along the way. Choosing professional installation can reduce delays, improve durability, and help protect the flooring manufacturer’s warranty.

    Many homeowners also choose to install new flooring while completing reconstruction and remodeling projects, allowing multiple home improvements to be finished together with less disruption.


    What to Expect During the Professional Flooring Installation Process

    Knowing what happens during a flooring installation can help homeowners prepare for the project and understand why some installations take longer than others. Professional installers follow a step-by-step process to ensure the flooring is installed correctly, safely, and according to the manufacturer’s recommendations.

    Initial Inspection and Measurements

    Every project begins with an inspection of the installation area. Installers measure the space, evaluate the existing flooring, and inspect the subfloor for moisture, cracks, or uneven surfaces. This assessment helps determine the scope of work and identifies any issues that could affect the installation timeline.

    Removing the Existing Flooring

    If old flooring needs to be removed, this stage can add several hours or even a full day to the project. Carpet is generally the quickest to remove, while tile and hardwood often require more labor because of adhesives, nails, or damaged underlayment. Removing the old flooring carefully also helps protect the subfloor beneath it.

    Preparing the Subfloor

    A properly prepared subfloor is one of the most important parts of a successful flooring installation. Installers clean the surface, repair minor imperfections, and level uneven areas to create a stable base for the new flooring. If extensive damage is discovered, homeowners may benefit from reconstruction and remodeling services before installation continues.

    Installing the New Flooring

    Once the subfloor is ready, the new flooring is installed using techniques that match the selected material. Floating floors such as laminate and luxury vinyl plank are typically installed more quickly, while hardwood and tile require greater precision and additional finishing steps. Professional installers also leave proper expansion gaps where needed to help prevent future movement.

    Final Inspection and Cleanup

    After installation is complete, the flooring is inspected to ensure it meets quality standards. Installers check for proper alignment, secure seams, smooth transitions, and a clean finish before removing debris and completing the project. This final review helps ensure the flooring is ready for long-term performance.


    How to Prepare Your Home Before Flooring Installation

    Preparing your home before the installation team arrives can help the project stay on schedule and reduce unnecessary interruptions. A little preparation also allows installers to work more efficiently from the moment they begin.

    • Remove furniture, decorations, and fragile items from the installation area.
    • Provide clear access to entryways and workspaces.
    • Keep children and pets away from the work area for safety.
    • Ask your contractor about when you can walk on the new flooring or move furniture back into the room.

    Taking these simple steps helps create a smoother installation experience and minimizes the risk of delays.


    Common Reasons Flooring Installation May Take Longer

    Although professional installers work efficiently, unexpected conditions can sometimes extend the project timeline. Most delays occur because hidden issues are discovered after work begins rather than because of the installation itself.

    Some of the most common causes include:

    • Hidden moisture or water damage beneath the flooring.
    • Uneven or damaged subfloors that require repairs.
    • Custom flooring patterns or intricate layouts.
    • Waiting for adhesives, grout, or finishes to cure.
    • Delays in material delivery or special-order products.

    Addressing these issues properly may add time to the project, but it helps ensure the finished floor remains durable and performs well for years.


    Frequently Asked Questions

    Can professional flooring installation be completed in one day?

    Yes. Small rooms with carpet, laminate, or luxury vinyl plank can often be completed in a single day, while larger or more complex projects typically require additional time.

    Which flooring type installs the fastest?

    Carpet, laminate, and luxury vinyl plank are generally the fastest flooring materials to install because they require less preparation and little or no curing time.

    How soon can I walk on newly installed flooring?

    It depends on the flooring type. Floating floors can often be walked on immediately or within a few hours, while tile and glue-down flooring may require 24 to 72 hours of curing time.

    Does removing old flooring increase the installation time?

    Yes. Removing existing flooring, cleaning adhesive residue, and preparing the subfloor can significantly increase the overall project timeline.


    Conclusion

    Professional flooring installation typically takes 1 to 5 days, but the exact timeline depends on the flooring material, project size, and condition of the subfloor. Proper preparation, skilled installation, and careful finishing all contribute to a high-quality result that lasts for years. By understanding the installation process and planning ahead, homeowners can set realistic expectations and enjoy a smoother, more efficient flooring project.

    References

  • How Long Does It Take to Rebuild a House After a Fire in Maryland? Timeline Guide

    How Long Does It Take to Rebuild a House After a Fire in Maryland? Timeline Guide

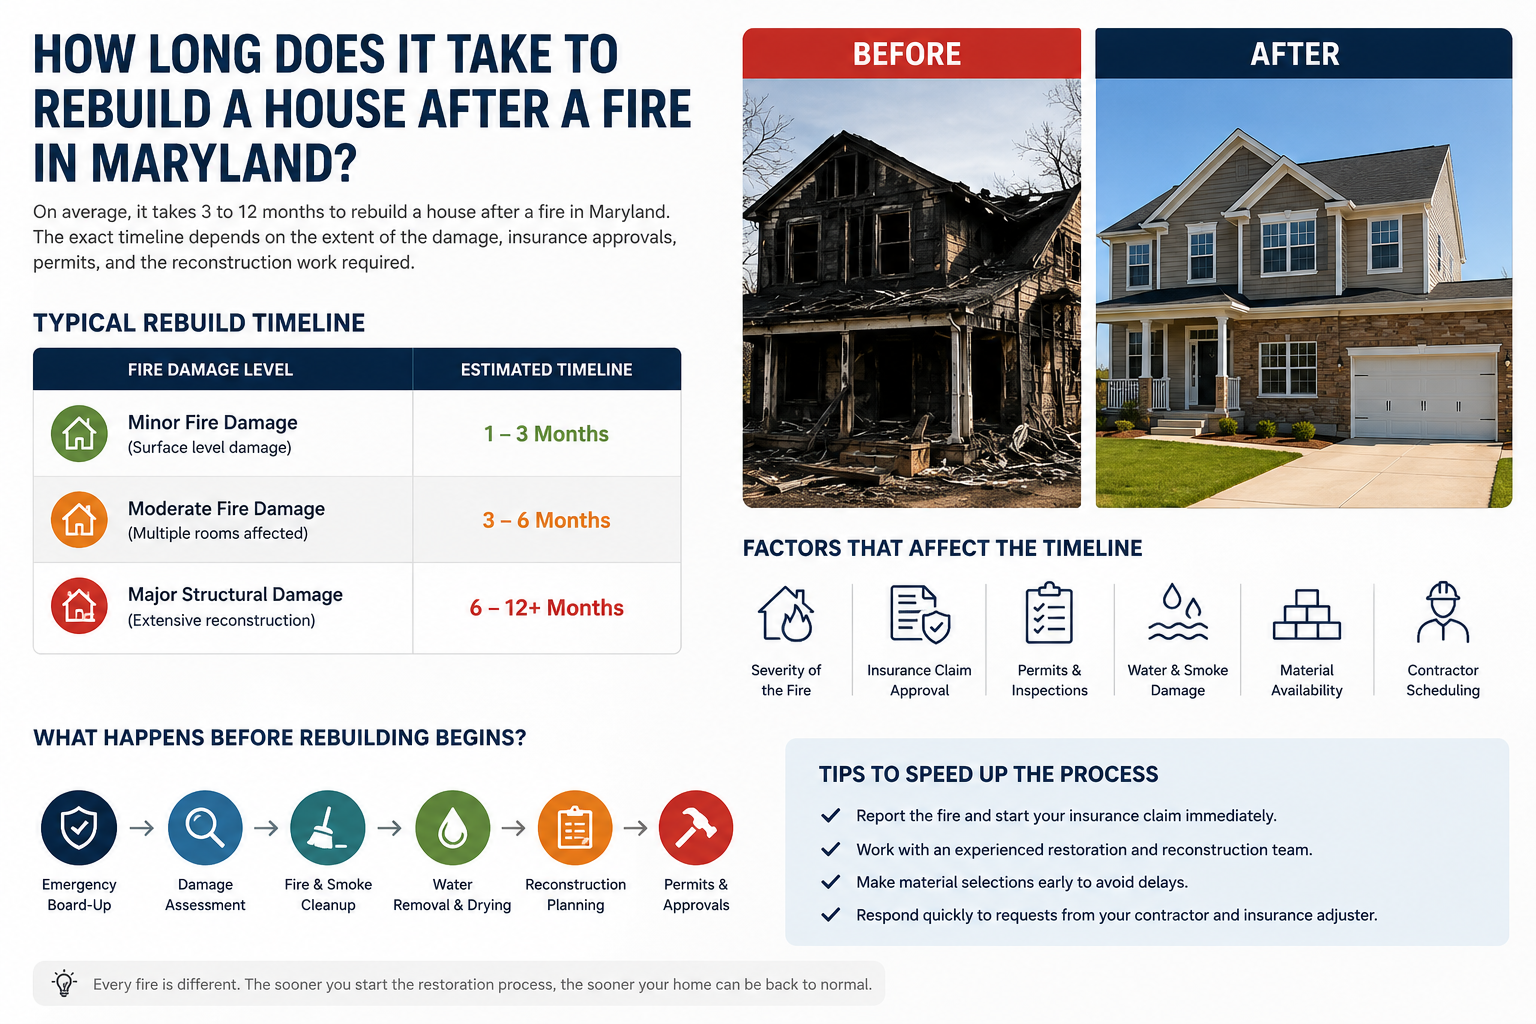
    If you’re wondering how long does it take to rebuild a house after a fire in Maryland, the average timeline is 3 to 12 months. Smaller repairs may be completed within a few months, while homes with major structural damage often take longer. The exact schedule depends on the severity of the fire, insurance approvals, permits, and the reconstruction work required.

    Fire Damage Restoration Timeline in Maryland

    Rebuilding doesn’t begin immediately after the fire is extinguished. Before construction starts, the property must be inspected, cleaned, and made safe. Smoke, soot, and water damage also need to be addressed before repairs can move forward.

    The table below provides a general timeline for different levels of fire damage.

    Fire Damage LevelTypical Rebuild Timeline
    Minor fire damage1–3 months
    Moderate fire damage3–6 months
    Major structural damage6–12+ months

    What Affects the Rebuilding Timeline?

    Several factors can shorten or extend the rebuilding process.

    Severity of the Fire

    Minor damage is usually repaired much faster than extensive structural damage. If the roof, framing, or foundation is affected, rebuilding will require additional time.

    Insurance Claim Approval

    Insurance companies typically inspect the property before approving major repairs. Delays in the claims process can postpone reconstruction even after cleanup has been completed.

    Permits and Inspections

    Most reconstruction projects require permits for structural, plumbing, or electrical work. Construction can only move forward once the necessary approvals are received.

    Smoke, Soot, and Water Damage

    A house fire often leaves behind more than burned materials. Smoke residue, soot, and water from firefighting efforts must be professionally removed before rebuilding begins. Many homeowners need Fire Damage Restoration and Water Damage Restoration before reconstruction can safely start.

    Material Availability

    The availability of building materials can influence the timeline. Custom cabinets, flooring, windows, or specialty products may take weeks to arrive, especially during periods of high demand.

    Contractor Scheduling

    Choosing an experienced restoration contractor early can help prevent unnecessary delays. A company that handles cleanup and reconstruction together can often keep the project moving more efficiently.

    What Happens Before Reconstruction Begins?

    The rebuilding process starts with securing the property and assessing the full extent of the damage. Contractors inspect the structure to determine what can be repaired and what needs to be replaced.

    Emergency Property Protection

    Openings in the roof, windows, or doors are secured to protect the home from weather, theft, and additional damage while restoration plans are being prepared.

    Fire Damage Cleanup

    Smoke, soot, debris, and damaged materials are removed before reconstruction begins. Thorough cleaning helps create a safe environment for rebuilding and prevents lingering odors.

    Water Damage Drying

    Water used to extinguish the fire can remain trapped inside walls, flooring, and insulation. Drying the structure before reconstruction helps reduce the risk of mold growth and future structural problems.

    Planning the Reconstruction

    Once cleanup is complete, contractors prepare repair plans, obtain permits, and schedule inspections. Completing these steps before construction begins helps keep the rebuilding process organized and reduces unexpected delays.

    Can You Stay in Your Home During the Rebuild?

    Whether you can remain in your home depends on the extent of the fire damage. Minor damage may allow you to stay in unaffected areas, but most moderate to severe fires require homeowners to move out until the property is safe.

    Minor Fire Damage

    If the fire is limited to one room and utilities remain functional, your contractor may be able to isolate the work area while you continue living in the home.

    Major Fire Damage

    If structural components, electrical systems, plumbing, or HVAC equipment are damaged, the home is usually considered unsafe until repairs are completed and inspections are passed.

    How to Speed Up the Rebuilding Process

    Although some delays are unavoidable, careful planning can help keep your project on schedule.

    Start the Insurance Claim Immediately

    Report the fire as soon as possible and provide any requested documentation. Starting the claim early allows inspections and approvals to begin sooner.

    Choose an Experienced Restoration Contractor

    Working with a contractor who provides Fire Damage Restoration and reconstruction services can simplify the process. A single team can coordinate cleanup, repairs, permits, and rebuilding more efficiently.

    Make Material Selections Early

    Selecting flooring, cabinets, fixtures, paint colors, and other finishes before construction begins helps avoid delays caused by backordered products or last-minute decisions.

    Respond Quickly to Requests

    Promptly reviewing estimates, approving changes, and signing required documents can help prevent unnecessary interruptions throughout the project.

    Why Professional Fire Damage Restoration Matters

    Fire damage often extends beyond what is visible. Heat, smoke, soot, and water can weaken structural materials and affect hidden areas of the home.

    Hidden Damage Detection

    Professional inspections help identify damaged framing, insulation, wiring, and other components that may not be visible during the initial assessment.

    Smoke and Odor Removal

    Specialized cleaning methods remove smoke residue and lingering odors from walls, ceilings, flooring, and HVAC systems before reconstruction begins.

    Water Damage Prevention

    Water used to extinguish the fire can lead to mold and additional structural damage if it isn’t removed properly. Combining Water Damage Restoration with fire restoration helps create a safe, dry environment for rebuilding.

    conclusion

    The answer to how long does it take to rebuild a house after a fire in Maryland depends on the damage, insurance process, permit approvals, and the scope of reconstruction. While some homes can be repaired within a few months, larger rebuilding projects often take six months or longer.

    Starting the restoration process quickly and working with experienced professionals can reduce delays and help your home return to a safe, comfortable condition as efficiently as possible.

    FAQs

    How soon should rebuilding begin after a house fire?

    Rebuilding should begin after the property is cleaned, inspected, and deemed safe, with insurance approval and required permits in place.

    Does homeowners insurance cover rebuilding after a fire?

    Most homeowners insurance policies cover fire damage reconstruction, but coverage depends on your policy and the cause of the fire.

    Can smoke and water damage delay rebuilding?

    Yes. Smoke, soot, and water damage must be professionally cleaned and dried before reconstruction can safely begin.

    What is the first step after a house fire?

    The first step is securing the property, contacting your insurance company, and scheduling a professional fire damage assessment.

    Can a house be rebuilt if it has severe fire damage?

    Yes. Even homes with significant structural damage can often be rebuilt, although the timeline is usually longer.

    References

  • Do I Need a Permit for Remodeling My Bathroom? A Complete Homeowner’s Guide

    Do I Need a Permit for Remodeling My Bathroom? A Complete Homeowner’s Guide

    A permit for remodeling bathroom depends on the type of renovation you’re planning. Cosmetic updates often don’t require permits, while plumbing, electrical, and structural changes usually do. Understanding permit requirements before starting your bathroom remodel helps ensure code compliance, avoids delays, and protects your investment.

    Do You Need a Permit for Remodeling Your Bathroom?

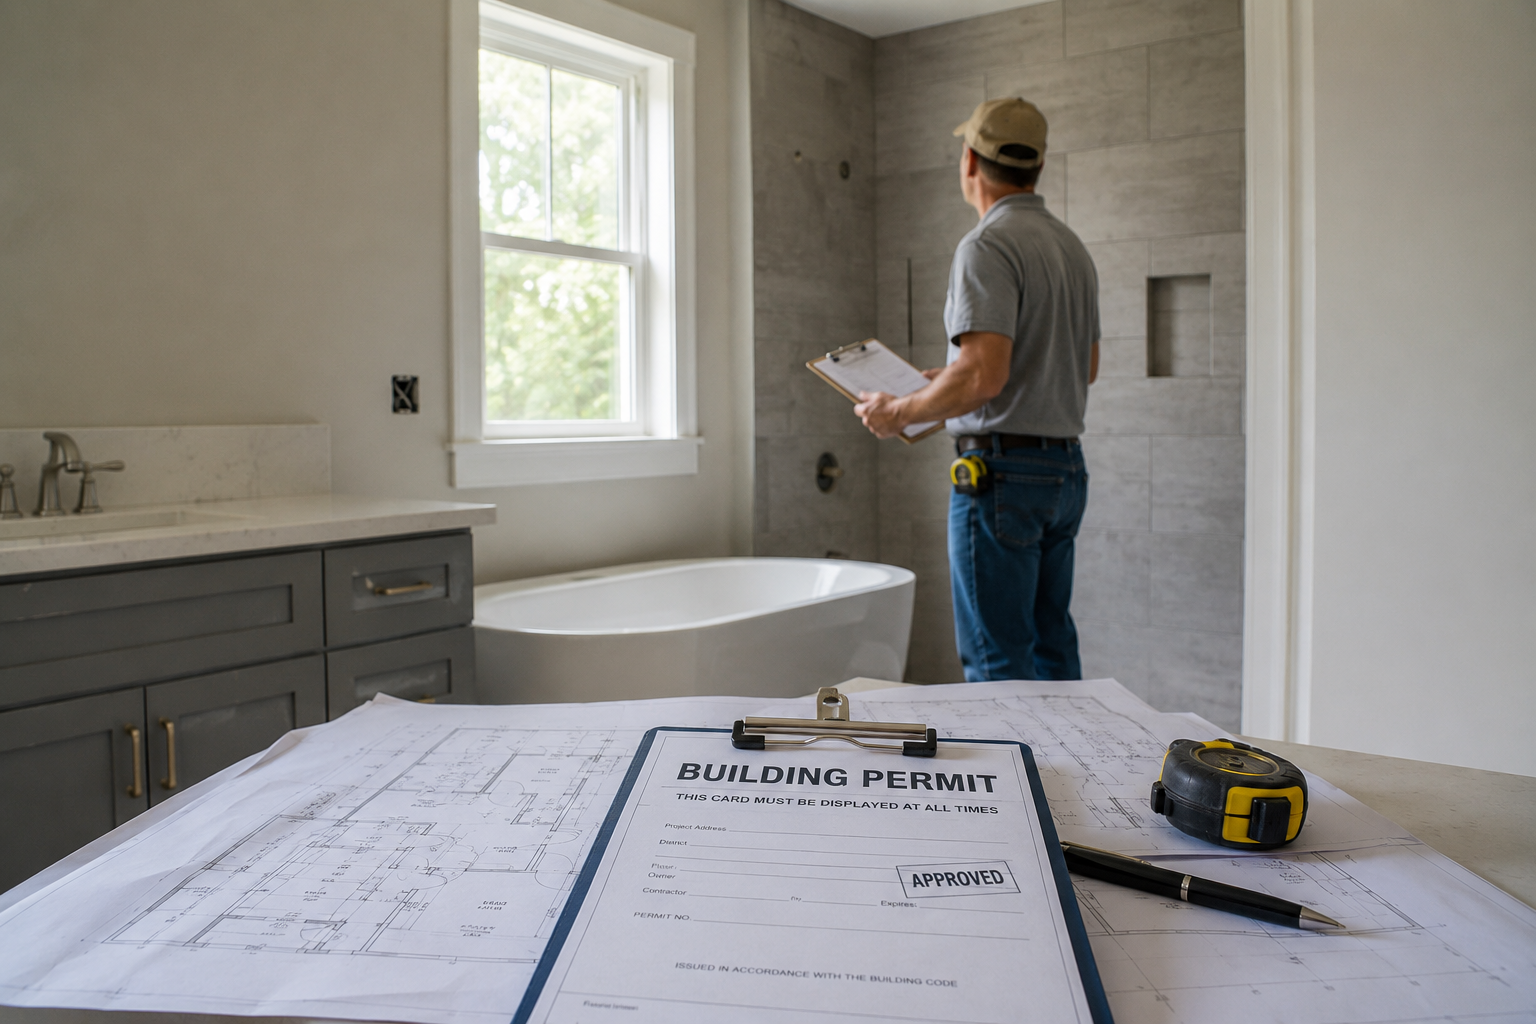
    In most cases, you need a permit if your bathroom remodel changes plumbing, electrical wiring, ventilation, or structural components. These permits ensure the work complies with local building codes and safety standards. Simple cosmetic improvements, however, can often be completed without approval.

    Even if your remodel seems minor, permit requirements can vary depending on local regulations. Checking with your local building department before work begins is the safest approach. If you’re planning a full Bathroom Remodeling project, an experienced contractor can also help determine which permits and inspections may be required.

    Bathroom Remodeling Projects That Usually Require a Permit

    Bathroom remodeling projects that modify your home’s plumbing system almost always require a permit. This includes moving a toilet or sink, installing a new shower or bathtub in a different location, replacing water supply lines, or altering drain pipes. Because these changes affect how water flows through your home, inspections help verify the work is safe and code-compliant.

    Electrical upgrades are another common reason permits are required. Installing new wiring, adding outlets, upgrading lighting, or wiring an exhaust fan must meet electrical code requirements, especially in moisture-prone areas like bathrooms. Proper permitting helps reduce the risk of electrical hazards and ensures safety features such as GFCI protection are installed where required.

    Structural changes typically require the highest level of review. Removing walls, expanding the bathroom, modifying floor framing, or changing window and door openings can affect your home’s structural integrity. Obtaining the proper permits before construction begins helps prevent costly corrections and ensures the renovation meets current building standards.

    Bathroom Updates That Typically Do Not Require a Permit

    Many bathroom improvements are considered cosmetic and usually don’t require a permit because they don’t alter plumbing, electrical, or structural systems. Projects such as painting walls, replacing mirrors, installing new flooring, updating cabinet hardware, or replacing a vanity in the same location are commonly completed without government approval.

    Although these upgrades are generally straightforward, it’s still worth confirming local requirements before starting your project. Small remodeling jobs can sometimes expand into larger renovations that involve plumbing or electrical changes. Planning ahead helps keep your bathroom remodel on schedule and avoids unnecessary interruptions.

    Why Building Permits Matter

    Building permits protect both homeowners and their investment by ensuring remodeling work meets current safety and construction codes. They also provide documentation that the renovation was inspected, which can be valuable when selling your home or filing certain insurance claims in the future.

    Skipping required permits may lead to fines, construction delays, or expensive repairs if the work doesn’t meet code. Many homeowners rely on professional Bathroom Remodeling and Home Remodeling services because experienced contractors understand local permit requirements, coordinate inspections, and help complete renovations correctly the first time.

    How the Bathroom Remodeling Permit Process Works

    The permit process is usually straightforward, although the exact steps vary by location. Before construction begins, you’ll typically submit information about the planned remodel, including any plumbing, electrical, or structural changes. Once the plans are reviewed and approved, the permit is issued, allowing work to begin legally.

    During the remodel, inspections may be required at different stages to verify that the work meets current building codes. These inspections help identify potential issues before walls, flooring, or fixtures are finished, reducing the chance of expensive repairs later. Working with a professional Bathroom Remodeling contractor can simplify this process because they are familiar with permit applications and inspection schedules.

    What Happens If You Remodel Without a Permit?

    Completing a bathroom remodel without a required permit can create problems long after the project is finished. If the unpermitted work is discovered, you may face fines, stop-work orders, or be required to remove completed work so inspectors can verify that it meets code.

    Unpermitted renovations can also affect future home sales and insurance claims. Buyers often ask whether remodeling projects were properly permitted, and insurance companies may review code compliance when handling claims related to water damage or electrical issues. Taking care of permits from the beginning is usually far less expensive than correcting problems later.

    Do DIY Bathroom Remodels Need Permits?

    Many homeowners assume permits only apply when hiring a contractor, but that’s not always true. If you’re completing plumbing, electrical, or structural work yourself, you may still be responsible for obtaining the required permits and scheduling inspections.

    DIY projects can save money on labor, but they must still comply with local building codes. If you’re unsure whether your renovation requires approval, consulting a remodeling professional before starting can help you avoid costly mistakes and keep the project moving smoothly.

    How to Find Out If Your Bathroom Remodel Needs a Permit

    The easiest way to determine whether your bathroom remodel requires a permit is to contact your local building department before construction begins. They can explain which types of work require approval and whether inspections will be necessary during the project.

    Many homeowners also discuss permit requirements with a trusted Home Remodeling or Bathroom Remodeling contractor during the planning stage. An experienced professional can identify permit-related work early, coordinate inspections, and help ensure the renovation complies with local building regulations from start to finish.

    conclusion

    The answer to do I need a permit for remodeling my bathroom depends on the type of renovation you’re planning. Cosmetic improvements are often exempt, while plumbing, electrical, and structural modifications usually require permits to meet safety and building code requirements.

    Planning ahead and verifying permit requirements before demolition begins can help prevent delays, unexpected expenses, and future legal or insurance issues. Whether you’re updating a small guest bathroom or completing a full renovation, following the proper permitting process helps ensure your investment is safe, compliant, and built to last.

    FAQs

    1. Do I need a permit for a small bathroom remodel?

    Not always. Cosmetic updates usually don’t require a permit, but plumbing, electrical, or structural changes often do.

    2. Do I need a permit to replace a bathtub with a shower?

    If the plumbing is relocated or modified, a permit is typically required. Simple replacements in the same location may not need one.

    3. Can I remodel my bathroom without a permit?

    You can complete cosmetic improvements without a permit in many cases, but skipping required permits can lead to fines and inspection issues.

    4. Does replacing bathroom tile require a permit?

    Replacing tile alone usually doesn’t require a permit unless it involves waterproofing, structural repairs, or plumbing modifications.

    5. Who is responsible for obtaining the permit?

    If you hire a licensed contractor, they often handle the permit process. Homeowners completing DIY projects may need to apply themselves.

    References

  • How Much Does a Kitchen Remodel Cost in Rockville? Average Costs & Budget Guide

    How Much Does a Kitchen Remodel Cost in Rockville? Average Costs & Budget Guide

    A kitchen remodel in Rockville typically costs between $15,000 and $60,000 or more, depending on the kitchen size, cabinet selection, countertop materials, appliances, labor requirements, and project scope. Basic kitchen updates may cost between $15,000 and $30,000, while mid-range remodels often range from $30,000 to $60,000. Homeowners choosing custom cabinetry, luxury finishes, premium appliances, or major layout changes can spend $100,000 or more.

    Average Kitchen Remodel Cost in Rockville

    Remodel TypeTypical Cost RangeCommon Features
    Basic Kitchen Remodel$15,000–$30,000Cabinet refacing, new countertops, paint, fixture upgrades
    Mid-Range Kitchen Remodel$30,000–$60,000New cabinets, countertops, flooring, appliances
    Luxury Kitchen Remodel$60,000–$150,000+Custom cabinetry, premium appliances, kitchen island, luxury finishes

    What Factors Affect Kitchen Remodeling Costs?

    Several factors determine how much you’ll spend on a kitchen remodel in Rockville. Understanding these variables can help you create a realistic renovation budget and prioritize upgrades that provide the most value.

    Kitchen Size

    Kitchen size has a direct impact on remodeling costs because larger spaces require more materials, cabinetry, flooring, countertops, and labor.

    Kitchen SizeTypical Cost Impact
    Small KitchenLowest Cost
    Medium KitchenModerate Cost
    Large KitchenHigher Cost
    Open-Concept KitchenHighest Cost

    A small kitchen may require fewer cabinets and less countertop space, while a large or open-concept kitchen often involves significantly higher material and labor costs.

    Cabinet Selection

    Cabinets are often the largest expense in a kitchen remodel and can account for a significant portion of the overall budget.

    Cabinet TypeTypical Cost Impact
    Stock CabinetsLowest Cost
    Semi-Custom CabinetsModerate Cost
    Custom CabinetsHighest Cost

    Homeowners can choose from stock, semi-custom, or custom cabinetry depending on their budget, storage needs, and design preferences.

    Countertop Materials

    Countertop selection plays a major role in both appearance and cost.

    Countertop MaterialTypical Cost Impact
    LaminateLowest Cost
    Butcher BlockModerate Cost
    QuartzHigher Cost
    GraniteHigher Cost
    MarblePremium Cost

    While laminate remains one of the most affordable options, quartz and granite continue to be popular choices because of their durability and visual appeal.

    Labor Costs

    Labor expenses typically account for a large percentage of the remodeling budget.

    Common labor costs may include:

    • Demolition
    • Cabinet installation
    • Countertop installation
    • Plumbing work
    • Electrical upgrades
    • Flooring installation
    • Painting and finishing

    Projects requiring multiple trades often cost more than cosmetic kitchen updates.

    Layout Changes

    Keeping the existing kitchen layout is usually the most cost-effective option. Moving sinks, dishwashers, gas lines, or major appliances often requires plumbing and electrical modifications that increase project costs.

    Structural changes, such as removing walls to create an open-concept kitchen, can further increase labor and construction expenses.

    Cost Breakdown by Kitchen Component

    Understanding where your remodeling budget goes can help you make informed decisions and prioritize upgrades.

    Kitchen ComponentTypical Cost Range
    Cabinets$5,000–$30,000+
    Countertops$2,000–$10,000+
    Flooring$1,500–$10,000+
    Appliances$3,000–$20,000+
    Lighting$500–$5,000+
    Kitchen Island$2,000–$15,000+

    Cabinets

    Cabinets are often the largest investment in a kitchen renovation. Costs vary based on material quality, customization level, storage features, and installation requirements.

    Countertops

    Countertop pricing depends on the material selected, edge profiles, thickness, and installation complexity. Quartz and granite are popular choices for homeowners seeking durability and style.

    Flooring

    Kitchen flooring must withstand heavy foot traffic and daily wear. Popular options include luxury vinyl plank, hardwood, ceramic tile, and porcelain tile.

    Appliances

    Appliance costs vary widely depending on brand, features, and energy efficiency. A complete appliance package can significantly affect the overall remodeling budget.

    Lighting and Electrical Upgrades

    Many homeowners update lighting during a remodel to improve both functionality and appearance. Recessed lighting, pendant lights, under-cabinet lighting, and electrical upgrades may add to project costs.

    Kitchen Island Installation

    A kitchen island can improve storage, seating, and workspace. Costs depend on size, countertop material, electrical additions, and custom features such as sinks or built-in appliances.

    Hidden Costs Homeowners Often Overlook

    How Much Does a Kitchen Remodel Cost in Rockville

    Many homeowners focus on cabinets, countertops, and appliances when budgeting for a kitchen remodel. However, unexpected expenses can appear once demolition begins.

    Common hidden costs include:

    • Permit fees
    • Electrical upgrades
    • Plumbing repairs
    • Structural modifications
    • Water damage repairs
    • Mold remediation
    • Material price increases

    Older homes may require electrical or plumbing updates to meet current building codes. These upgrades can increase costs but are often necessary for safety and long-term performance.

    In some projects, contractors discover hidden issues behind walls, under flooring, or around existing plumbing. Working with a kitchen remodeling contractor in Rockville can help identify potential problems before construction begins.

    Kitchen Remodel Cost by Project Scope

    The overall cost of a kitchen remodel depends heavily on the amount of work being completed.

    Cosmetic Refresh

    A cosmetic kitchen update focuses on appearance improvements while keeping most existing features.

    Common upgrades include:

    • Cabinet painting
    • New cabinet hardware
    • Updated lighting fixtures
    • New backsplash
    • Fresh paint

    This is typically the most budget-friendly remodeling option.

    Partial Kitchen Remodel

    A partial remodel updates selected areas of the kitchen while leaving others unchanged.

    Examples include:

    • New countertops
    • Flooring replacement
    • Appliance upgrades
    • Sink and faucet replacement

    This option allows homeowners to improve functionality without the cost of a full renovation.

    Full Kitchen Renovation

    A full kitchen remodel involves replacing most major components.

    Projects often include:

    • New cabinets
    • New countertops
    • Flooring replacement
    • Appliance installation
    • Lighting upgrades

    Many homeowners choose this option when updating an outdated kitchen or preparing a home for long-term use.

    Luxury Kitchen Transformation

    Luxury remodels focus on custom design, premium materials, and high-end functionality.

    Common features include:

    • Custom cabinetry
    • Professional-grade appliances
    • Large kitchen islands
    • Quartz or natural stone countertops
    • Custom lighting designs
    • Built-in storage solutions

    These projects generally require the highest investment but offer extensive customization.

    Does a Kitchen Remodel Increase Home Value?

    A kitchen remodel is often considered one of the most valuable home improvement projects because kitchens play a major role in buyer decision-making.

    Potential benefits include:

    • Improved functionality
    • Better storage
    • Modern appearance
    • Increased buyer appeal
    • Enhanced resale potential

    While returns vary, updated kitchens often help homes compete more effectively in the local market.

    Tips to Save Money on a Kitchen Remodel

    Homeowners can often reduce remodeling costs without sacrificing quality.

    Consider these strategies:

    • Keep the existing layout
    • Refinish cabinets instead of replacing them
    • Choose mid-range materials
    • Compare multiple contractor estimates
    • Prioritize high-impact upgrades
    • Set aside a contingency budget

    Careful planning can help prevent unexpected expenses and keep projects on track.

    How to Get an Accurate Kitchen Remodeling Estimate in Rockville

    Online calculators can provide general cost ranges, but they cannot account for the unique details of your home.

    Professional estimates typically consider:

    • Kitchen size
    • Existing conditions
    • Material preferences
    • Appliance selections
    • Layout modifications
    • Labor requirements

    Homeowners comparing renovation options can learn more about kitchen remodeling services in Rockville and request a detailed evaluation based on their specific goals and budget.

    conclusion

    The cost of a kitchen remodel in Rockville can range from approximately $15,000 for basic updates to well over $100,000 for luxury renovations. Factors such as kitchen size, cabinet selection, countertop materials, appliances, labor costs, and project scope all influence the final investment.

    Understanding these costs can help homeowners set realistic expectations, prioritize upgrades, and create a renovation plan that aligns with both their needs and budget. If you’re considering a project, consulting with local kitchen remodelers in Rockville is the best way to obtain accurate pricing and explore options for your home.

    FAQs

    How much does a kitchen remodel cost in Rockville?

    Most kitchen remodels in Rockville cost between $15,000 and $60,000+, depending on the kitchen size, materials, labor, and project scope.

    What is the most expensive part of a kitchen remodel?

    Cabinets are often the largest expense, especially when homeowners choose semi-custom or custom cabinetry.

    Does kitchen size affect remodeling costs?

    Yes. Larger kitchens require more cabinets, countertops, flooring, and labor, resulting in higher renovation costs.

    Is it cheaper to keep the existing kitchen layout?

    Yes. Keeping appliances, plumbing, and electrical systems in their current locations can significantly reduce costs.

    How long does a kitchen remodel take?

    Most kitchen remodels take between 4 and 12 weeks, depending on the complexity of the project and material availability.

    Does a kitchen remodel increase home value?

    A well-planned kitchen remodel can improve functionality, buyer appeal, and overall resale value.

    Should I get multiple kitchen remodeling estimates?

    Yes. Comparing estimates from multiple contractors helps you understand pricing, scope, and available remodeling options.

    References

  • How Much Does a Bathroom Remodel Cost in Rockville? Average Costs & Pricing Guide

    How Much Does a Bathroom Remodel Cost in Rockville? Average Costs & Pricing Guide

    A bathroom remodel in Rockville typically costs between $8,000 and $30,000 or more, depending on the bathroom size, materials used, labor requirements, and project complexity. Basic remodels often range from $8,000 to $15,000, while luxury renovations with custom features can exceed $50,000.

    Average Bathroom Remodel Cost in Rockville

    Remodel TypeTypical Cost RangeCommon Features
    Basic Remodel$8,000–$15,000Paint, vanity replacement, standard fixtures, flooring updates
    Mid-Range Remodel$15,000–$25,000New shower, upgraded tile, lighting improvements, quality finishes
    Luxury Remodel$25,000–$50,000+Custom cabinetry, walk-in shower, premium materials, designer features

    What Factors Affect Bathroom Remodeling Costs?

    Several factors influence how much you’ll pay for a bathroom remodel in Rockville.

    Bathroom Size

    Larger bathrooms require more materials, more labor, and often additional fixtures, increasing overall project costs.

    Bathroom TypeTypical Cost Range
    Powder Room$5,000–$10,000
    Guest Bathroom$8,000–$20,000
    Full Bathroom$10,000–$25,000
    Primary Bathroom$20,000–$50,000+

    Material Selection

    The quality of materials has a major impact on remodeling costs.

    Material LevelCost Impact
    Budget MaterialsLowest Cost
    Mid-Range MaterialsModerate Cost
    Premium MaterialsHighest Cost

    Examples include:

    • Budget: Ceramic tile, stock vanity, acrylic shower surround
    • Mid-Range: Porcelain tile, quartz vanity top, upgraded fixtures
    • Premium: Natural stone, custom cabinetry, frameless glass shower

    Labor Costs

    Labor typically accounts for a large portion of the remodeling budget.

    Common labor expenses include:

    • Demolition
    • Plumbing work
    • Electrical upgrades
    • Tile installation
    • Drywall repairs
    • Painting
    • Fixture installation

    Layout Changes

    Keeping the existing bathroom layout is usually the most affordable option. Moving plumbing lines, relocating fixtures, or making structural modifications can significantly increase remodeling costs.

    Cost Breakdown by Bathroom Component

    Understanding where your remodeling budget goes can help you prioritize upgrades and avoid overspending.

    Bathroom ComponentTypical Cost Range
    Shower or Tub Replacement$2,000–$10,000+
    Vanity Installation$500–$5,000+
    Countertops$300–$3,000+
    Flooring & Tile Work$1,000–$8,000+
    Plumbing Fixtures$500–$4,000+
    Lighting & Ventilation$300–$2,500+
    Painting & Finishing$500–$2,000+

    Shower and Bathtub Installation

    The shower or bathtub is often one of the most expensive parts of a bathroom remodel. Costs vary based on the size, materials, waterproofing requirements, and whether a standard unit or custom installation is selected.

    Vanity and Countertops

    Vanities can range from affordable stock models to fully customized cabinetry. Countertop materials such as laminate, quartz, granite, and marble also affect the final price.

    Flooring and Tile Work

    Tile costs depend on the material selected and the complexity of installation. Larger bathrooms and custom tile patterns generally require more labor and increase overall remodeling costs.

    Plumbing Fixtures

    Replacing sinks, faucets, toilets, and shower fixtures can improve both functionality and appearance. Premium fixtures typically cost more but may offer better durability and water efficiency.

    Lighting and Ventilation

    Many homeowners upgrade lighting and ventilation during a remodel. New vanity lights, recessed lighting, and modern exhaust fans can improve comfort while adding to the project budget.

    Hidden Costs Homeowners Often Overlook

    Many homeowners budget for visible upgrades such as tile, vanities, and fixtures but overlook expenses that can arise once construction begins. Identifying these potential costs early can help prevent budget surprises.

    Common hidden expenses include:

    • Permit fees
    • Plumbing repairs
    • Electrical upgrades
    • Water damage repairs
    • Mold remediation
    • Structural repairs
    • Material price increases

    In some cases, contractors may discover hidden leaks behind walls or beneath flooring during demolition. Addressing these issues early is important because moisture problems can affect both the longevity and safety of the remodel. If moisture concerns are discovered, Leak Detection, Moisture Monitoring, or Structural Drying and Dehumidification services may be necessary before renovation work continues.

    Older homes may also contain outdated plumbing or electrical systems that require upgrades to meet current building standards, increasing overall remodeling costs.

    Bathroom Remodel Cost by Project Scope

    Bathroom Remodel Cost by Project Scope

    The scope of your renovation has a major impact on the final budget.

    Cosmetic Refresh

    A cosmetic update focuses on appearance improvements while keeping the existing layout intact.

    Typical upgrades include:

    • Painting
    • New fixtures
    • Vanity replacement
    • Hardware updates
    • Mirror replacement

    This is often the most affordable remodeling option.

    Partial Remodel

    A partial remodel involves replacing selected components while leaving others untouched.

    Examples include:

    • New flooring
    • Shower replacement
    • Vanity upgrade
    • Lighting improvements

    This approach provides noticeable improvements without the expense of a complete renovation.

    Full Bathroom Renovation

    A full remodel typically involves replacing most bathroom components and updating finishes throughout the space.

    Projects may include:

    • New shower or bathtub
    • Flooring replacement
    • Vanity installation
    • Plumbing fixture upgrades
    • Lighting improvements

    Luxury Bathroom Transformation

    Luxury remodels focus on custom designs and premium materials.

    Common features include:

    • Walk-in showers
    • Custom cabinetry
    • Heated flooring
    • Frameless glass enclosures
    • Designer fixtures
    • Natural stone finishes

    Does a Bathroom Remodel Increase Home Value?

    A bathroom remodel can improve both daily comfort and resale appeal. Updated bathrooms are often viewed favorably by potential buyers and can help a home stand out in a competitive market.

    Potential benefits include:

    • Improved functionality
    • Modern appearance
    • Better energy efficiency
    • Increased buyer interest
    • Higher perceived property value

    While returns vary, well-planned renovations generally provide one of the stronger returns among home improvement projects.

    Tips to Save Money on a Bathroom Remodel

    Homeowners can often reduce remodeling costs without sacrificing quality.

    Consider the following strategies:

    • Keep the existing layout
    • Refinish instead of replace when possible
    • Compare multiple contractor estimates
    • Choose durable mid-range materials
    • Plan purchases in advance
    • Set aside a contingency budget

    Careful planning can help prevent unexpected expenses and keep projects on schedule.

    How to Get an Accurate Bathroom Remodeling Estimate in Rockville

    Online cost calculators can provide rough estimates, but an in-person evaluation offers the most accurate pricing.

    Contractors typically evaluate:

    • Bathroom size
    • Existing conditions
    • Material preferences
    • Plumbing requirements
    • Electrical upgrades
    • Design goals

    Homeowners interested in comparing local remodeling options can explore bathroom remodeling services in Rockville to better understand pricing, timelines, and project requirements before making a final decision.

    conclusion

    The cost of a bathroom remodel in Rockville can range from a few thousand dollars for basic updates to more than $50,000 for luxury renovations. Bathroom size, material choices, labor requirements, and project scope all play a significant role in determining the final cost.

    Understanding these factors can help homeowners set realistic expectations, prioritize upgrades, and create a remodeling budget that aligns with their goals.

    FAQs

    How much does a bathroom remodel cost in Rockville?

    Most bathroom remodels in Rockville cost between $8,000 and $30,000+, depending on the bathroom size, materials, and project scope.

    What is the most expensive part of a bathroom remodel?

    Shower installations, custom tile work, plumbing changes, and high-end cabinetry are often the most expensive components.

    Does bathroom size affect remodeling costs?

    Yes. Larger bathrooms require more materials, fixtures, and labor, which increases the overall renovation cost.

    How long does a bathroom remodel take?

    Most bathroom remodeling projects take between 2 and 6 weeks, depending on complexity and material availability.

    Is it cheaper to keep the existing bathroom layout?

    Yes. Keeping plumbing and fixtures in their current locations can significantly reduce labor and renovation costs.

    Does a bathroom remodel increase home value?

    A well-planned bathroom remodel can improve functionality, buyer appeal, and overall property value.

    Should I get multiple remodeling estimates?

    Yes. Comparing estimates from multiple contractors helps homeowners understand pricing and make informed decisions.

    References